
Before you get started
This guide is for existing License Express customers who want to update account information and preferences, such as their:
- Profile (name, email, phone number)
- Bank account information
- Addresses for their customer account or specific accounts
- Passwords
- Online access—for example, if they want to close their account
If you previously used Taxpayer Access Point (TAP) to manage your account, you could learn:
If you’re a service agent acting on behalf of a customer, you can follow the same instructions as the taxpayer.
Gather the required information
The information and documents you’ll need depend on the updates you want to make in License Express.
What to gather and where to go
| Type of information or preference | What you’ll need | Related section |
|---|---|---|
| Profile (name, email address, and phone number) | New names, phone numbers, and/or email addresses you want to use | How to update your profile (name, email address, phone number) |
| Bank account information | Your bank account and routing number | How to add or update your bank account information |
| Account addresses | New address(es) you want to use | How to update your account addresses |
| Password | New password | How to update your password |
| Close your account | File all remaining returns and pay all taxes and fees | How to close your account |
Note: Account closure requests will be processed within a few business days, but we will honor the date of your original request when processing.
How to update your profile (name, email address, phone number)
Follow the steps below to update your name, email address, or phone number.

1. On the “Summary” page, choose “Manage My Profile.”
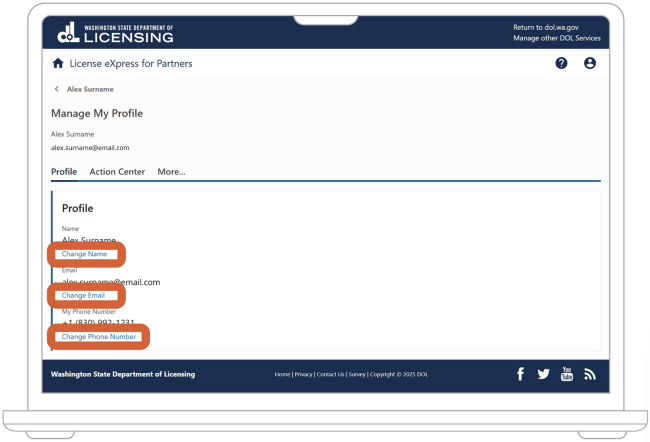
2. Under “Profile,” indicate which profile information you want to update. Your next step will depend on your choice.
- To update your name, choose “Change Name.” Skip to step 3.
- To update your email address, choose “Change Email.” Skip to step 5.
- To update your phone number, choose “Change Phone Number.” Skip to step 12.
Update your name
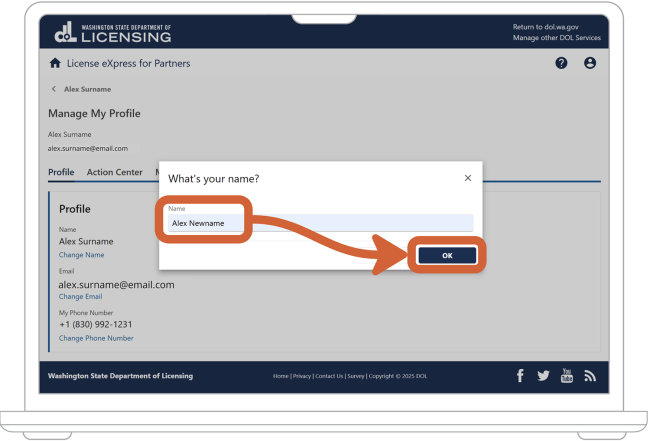
3. In the “What’s your name?” popup, enter your new name over the name that appears now.
4. Choose the “OK” button.
Update your email address
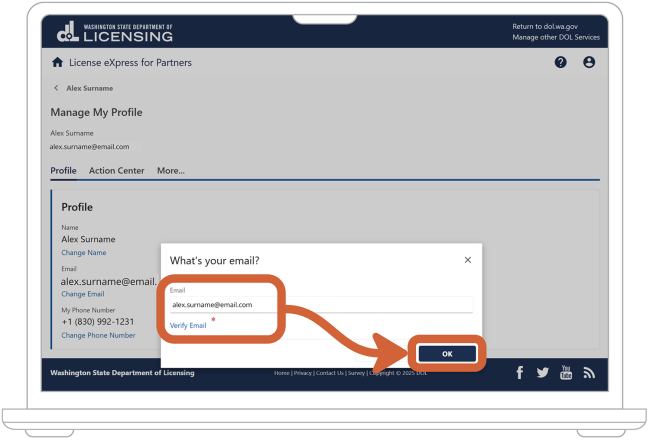
5. In the “What’s your email?” popup, enter your new email over the email that appears now.
6. Choose “Verify Email.”
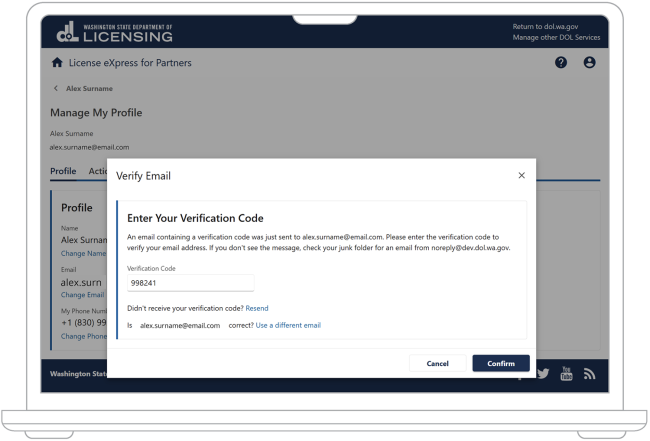
7. License Express will send an email with a verification code to the new email address you entered. If you don’t see it in your inbox, check your junk or spam folder.
8. Enter the verification code.
9. Choose the “Confirm” button.
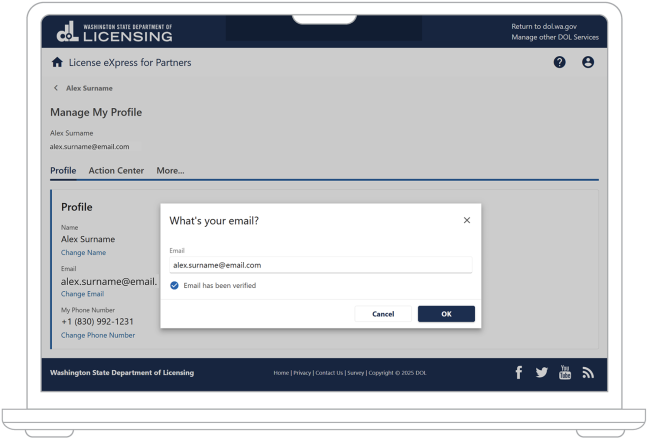
10. If License Express accepts your verification code, the popup will show a message that says, “Email has been verified.”
11. Choose the “OK” button.
Update your phone number
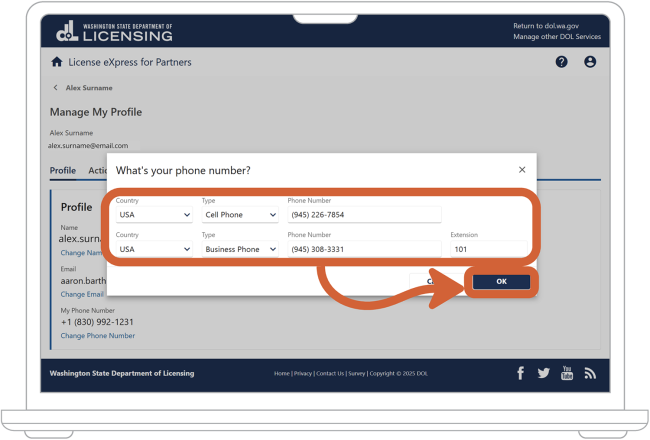
12. In the “What’s your phone number?” popup, you can see your current phone number(s). To update or add a new phone number, enter the following information:
- In the dropdown menu under “Country,” select the country for your phone number. License Express will automatically select “USA.”
- In the dropdown menu under “Type,” select your phone number type.
- Enter your phone number.
- Enter the extension (if applicable).
- If you need to update or enter a second phone number, repeat steps 12 to 14.
13. Once you’re finished entering phone numbers, choose the “OK” button.
How to add or update your bank account information
Follow the steps below to add or update your bank account information.
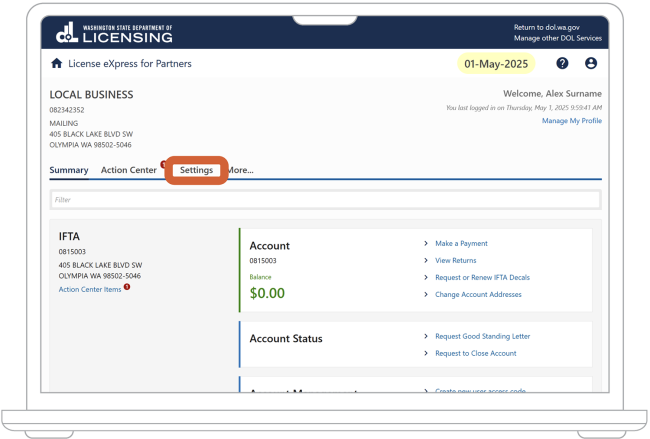
1. On the "Summary” page, choose “Settings” in the main navigation.
2. On the “Settings” page, find the “Account” heading. Under “Default Payment Channel,” choose your current preference. If you haven’t added your bank account information, your current preference will be “None.”
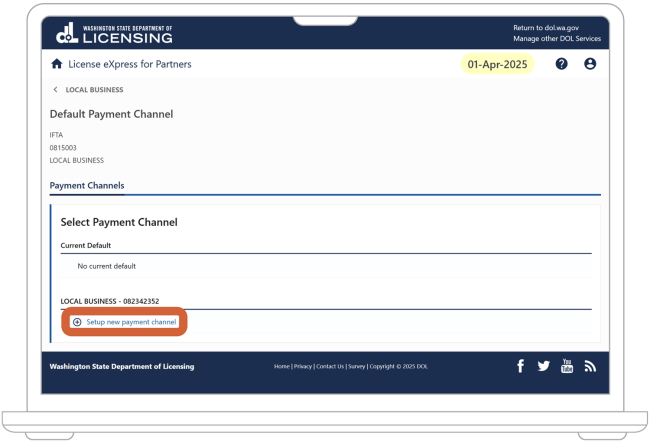
3. Under your organization’s name and account number, choose “Setup new payment channel.”

4. Under “Payment Channel,” enter the following information about your bank account:
- Enter your bank’s routing number.
- Enter your bank account number.
- Confirm your bank account number by reentering it.
- Indicate your bank account type by choosing either the “Checking” or “Savings” option.
- Enter the name you want to use for this bank account in License Express. This may be helpful if you have multiple bank accounts, and if some of them are shared with others.
- Choose the “Save” button.
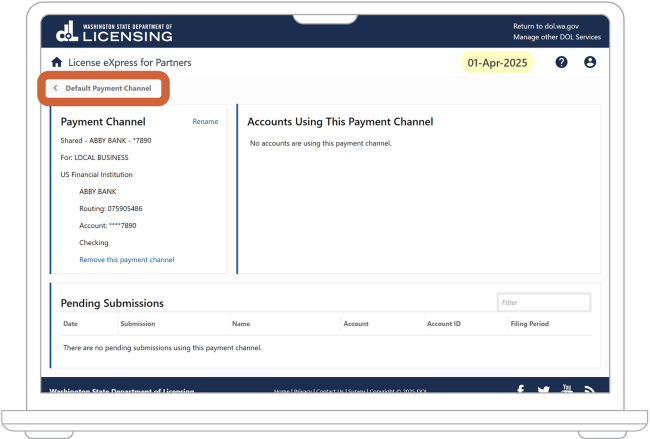
5. Under “Accounts Using This Payment Channel,” you can check which of your Prorate and Fuel Tax (PRFT) accounts are using this bank account.
6. Choose “Default Payment Channel.”
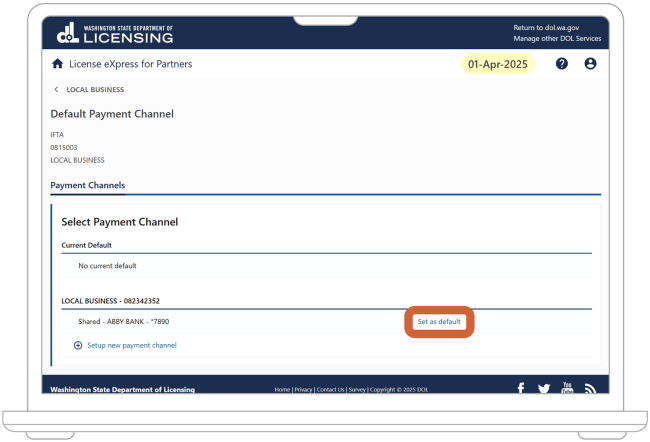
7. To make this your default payment channel, choose “Set as default.”
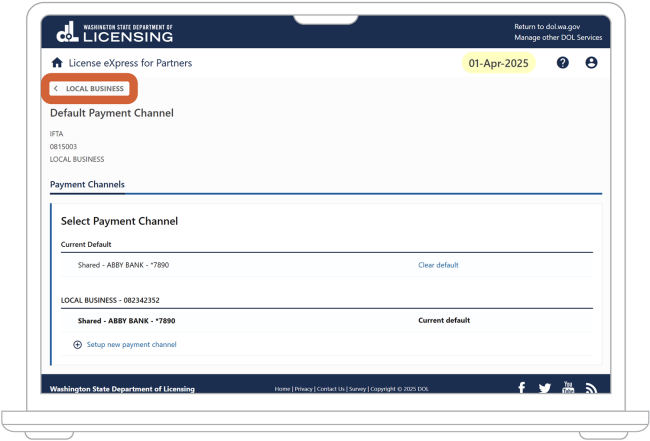
8. Under “Current Default,” you can confirm that your updated bank account is now the default payment channel for your PRFT account:
- If you want to stop using a bank account as the default payment channel, choose “Clear default.”
- If you want to add information for a different bank account, repeat steps 3 to 6.
- Once you’re finished making changes, choose the name of your organization at the top of the page.
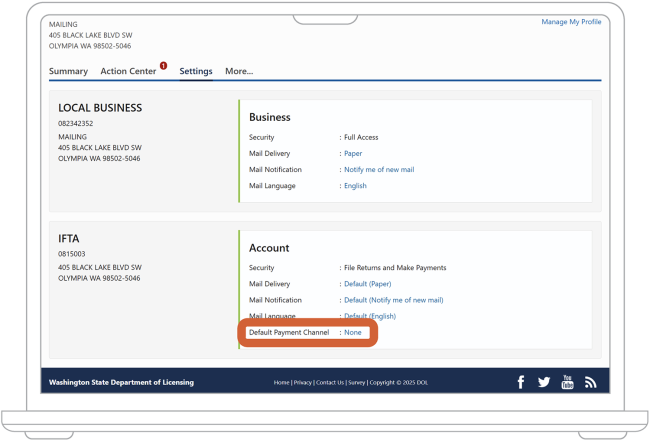
9. On the “Settings” page, under “Default Payment Channel,” your current preference will show the name you entered for your bank account.
How to update your account addresses
You can add or update the following types of addresses for a PRFT account:
- Physical address—your organization’s location
- Mailing address—where your organization receives mail
- Location of records—where you or someone else stores your organization’s records
Some of these addresses may be the same, or each may be different.
Follow the steps below to update the account addresses associated with your customer account or specific accounts.
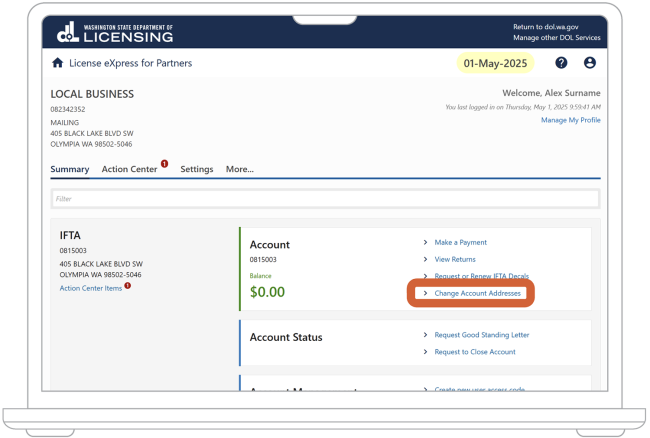
1. On the "Summary” page, find the "account” heading. Then choose “Change Account Addresses.”
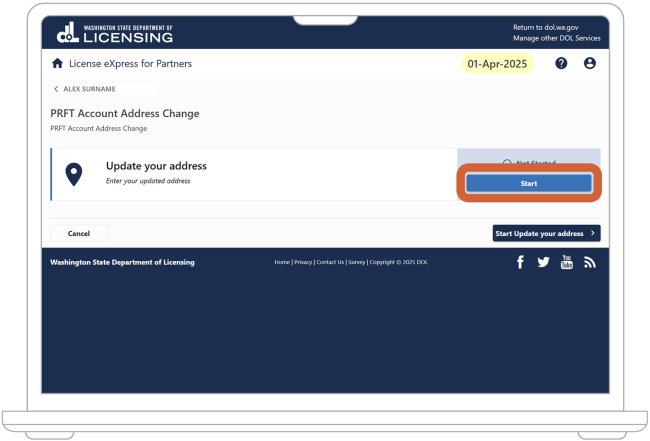
2. Under “Update your address,” choose the “Start” button.
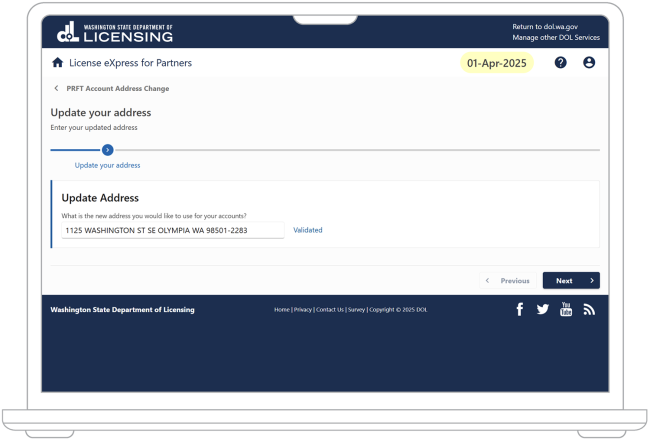
3. Enter the new address you want to use for your account.
4. Choose the “Next” button.
5. Your next step will depend on whether you have one address or separate addresses for this account:
- If you have one address for this account, skip to step 6.
- If you have different addresses for this account, skip to step 11.
If you currently have only one address

6. Under “Add Address to Accounts,” choose the “Start” button.

7. Indicate whether you want to add the new address as your mailing address or location of records:
- To add the new address as your mailing address, check the box next to “Add as Mailing Address.”
- To add the new address as your location of records, checking the box next to “Add as Location of Records.”
- If you don’t want to use the new address as your mailing address or location of records, leave both boxes blank.
- Choose the “Next” button.
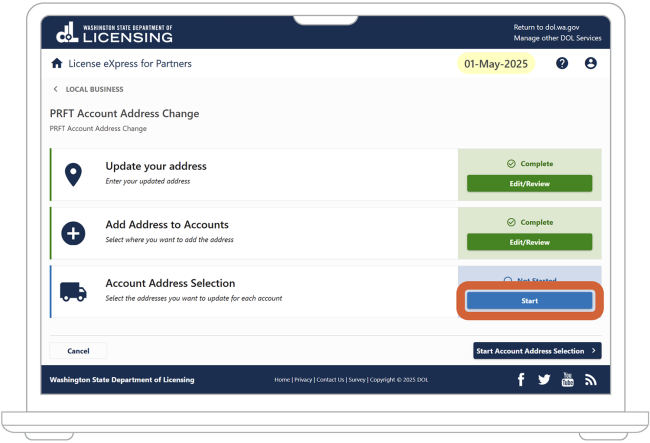
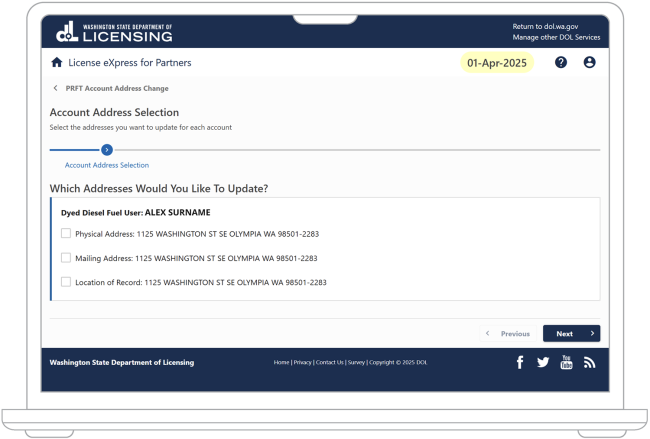
8. Under “Account Address Selection,” choose the “Start” button.

9. Indicate which addresses you want to replace with the new address:
- To replace your physical address with the new address, check the box next to “Physical Address.”
- To replace your mailing address with the new address, check the box next to “Mailing Address.” Note: If you don't currently have a separate mailing address, it won’t appear on this page.
- To replace your location of records with the new address, check the box next to “Location of Records.” Note: If you don't currently have a separate location of records, it won’t appear on this page.
- Choose the “Next” button.
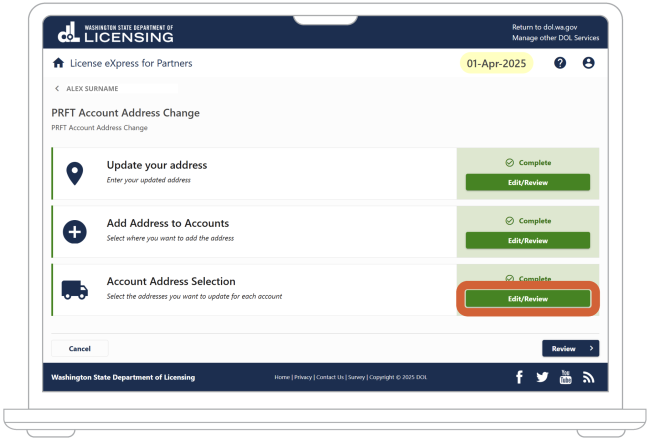
10. If you need to go back and make changes, you can use the “Edit/Review” buttons. Otherwise, choose the “Review” button and skip to step 16.
If you currently have multiple addresses
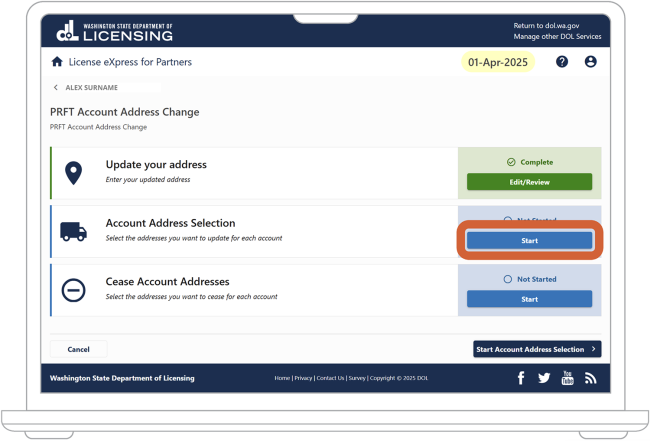
11. Under “Account Address Selection,” choose the “Start” button.
12. Indicate which addresses you want to replace with the new address:
- To replace your physical address with the new address, check the box next to “Physical Address.”
- To replace your mailing address with the new address, check the box next to “Mailing Address.” Note: If you don't currently have a separate mailing address, it won’t appear on this page.
- To replace your location of records with the new address, check the box next to “Location of Records.” Note: If you don't currently have a separate location of records, it won’t appear on this page.
- Choose the “Next” button.
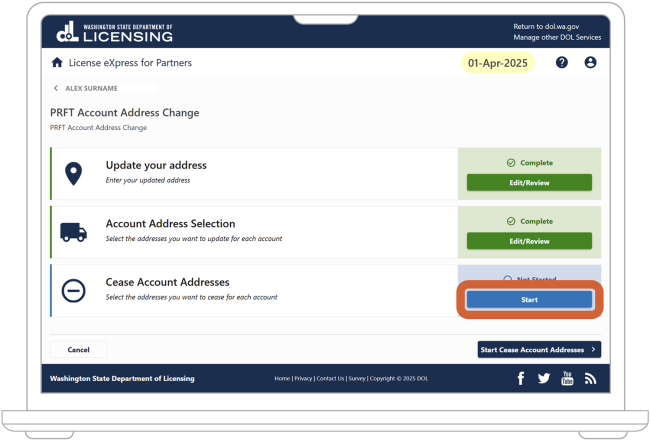
13. Under “Cease Account Addresses,” choose the “Start” button.

14. Indicate whether you want to delete addresses from your account:
- To delete your mailing address, check the box next to “Mailing Address.” Note: If you don't currently have a separate mailing address, it won’t appear on this page.
- To delete your location of records, check the box next to “Location of Records.” Note: If you don't currently have a separate location of records, it won’t appear on this page.
- If you don’t want to delete any addresses, leave the boxes blank.
- Choose the “Next” button.
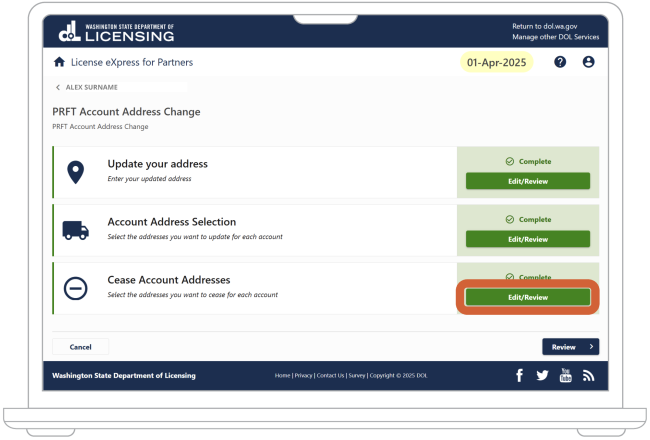
15. If you need to go back and make changes, you can use the “Edit/Review” buttons. Otherwise, choose the “Review” button and skip to step 16.
Confirm your address changes
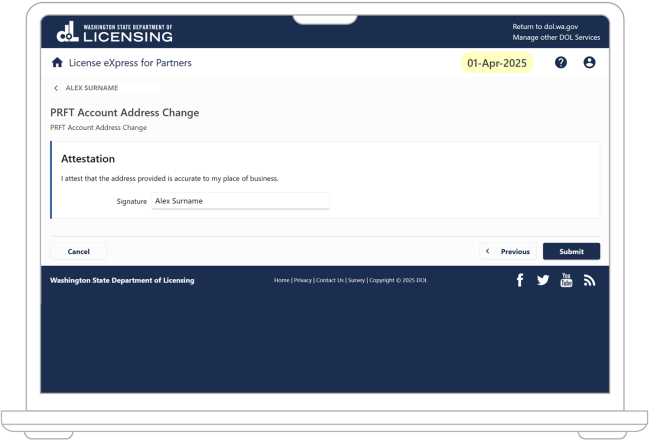
16. Enter your name to confirm you have entered the correct addresses for your organization.
17. Choose the “Submit” button.
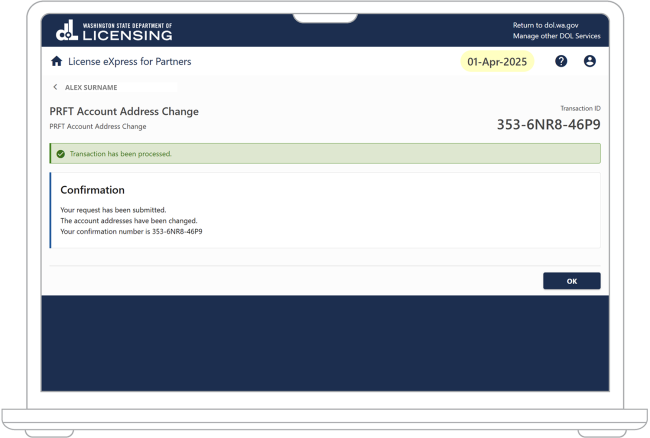
18. On the “Confirmation” screen, you'll see a confirmation number (also called a transaction ID). Keep it for your records. We may ask for it if you ever contact us for help.
Choose the “OK” button to return to your dashboard.
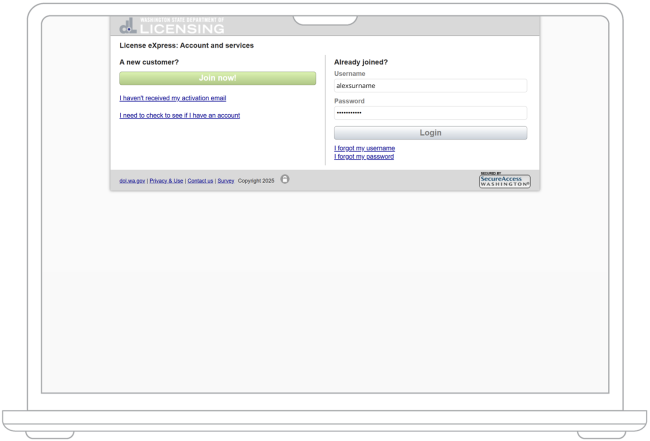
How to update your password
Follow the steps below to update your password.
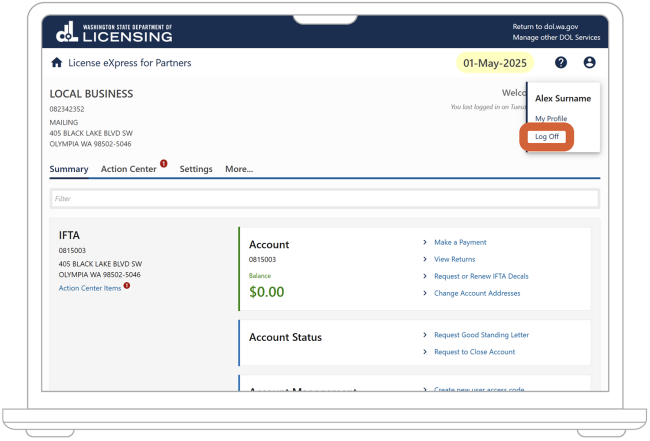
1. Choose the person icon in the top right corner. Then choose “Log Off.”
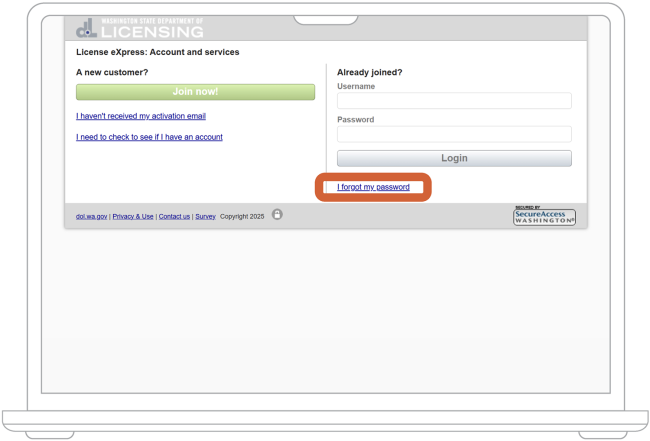
2. Under the “Login” button, choose “I forgot my password.” You must select this even if you know your password but want to change it.
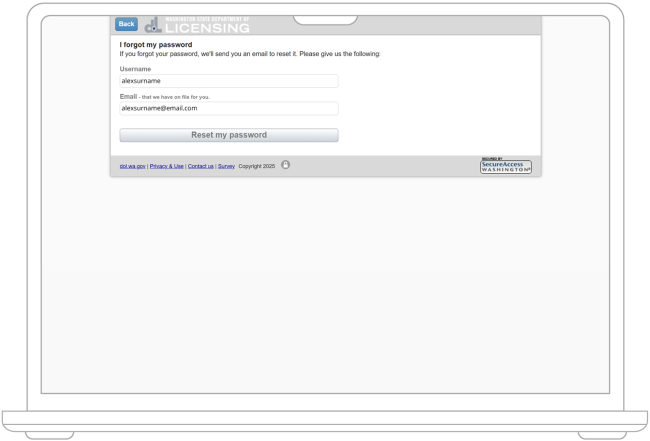
3. Enter your License Express username.
4. Enter the email you use for License Express.
5. Choose the “Reset my password” button.
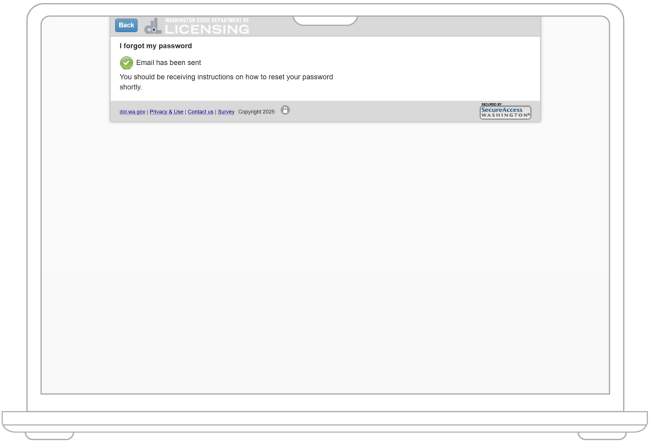
6. We'll email you a temporary password. You must enter it before creating a new permanent password. If you can’t find the email from us in your inbox, check your junk or spam folder.
7. Choose the “Back” button.
8. Enter your username.
9. Enter the temporary password we sent you.
10. Choose the “Login” button.

11. You’ll see a message saying your password expired or you reset it, and that you need to create a new password.
Your new password must be at least 10 characters long and include at least 3 of the following:
- A number
- A special character, such as $, %, or #
- An uppercase letter
- A lowercase letter
12. Enter the temporary password we sent you.
13. Enter your new password.
14. Confirm your new password by reentering it.
15. Choose the “Change password” button.
How to close your account
Before you can close a PRFT account, you must file any remaining tax returns and pay all taxes and fees.
If you close your account during a filing period, you must still file a tax return for that period and all earlier periods when your account was open.
Remember that you need a license and account to legally operate in IFTA jurisdictions.
Follow the steps below to close your account.
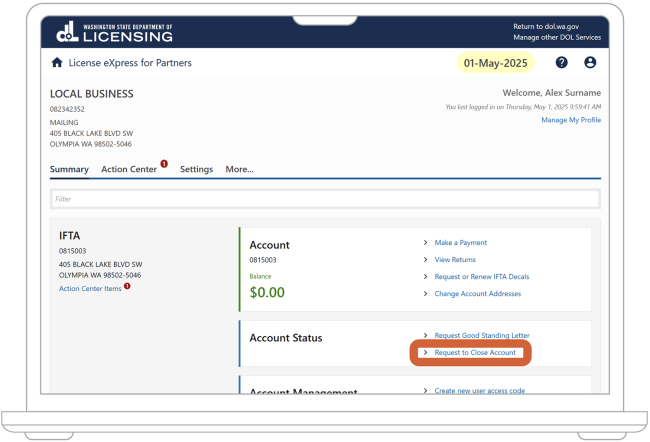
1. On the Summary page, find the “Account Status” heading. Then choose “Request to Close Account.”
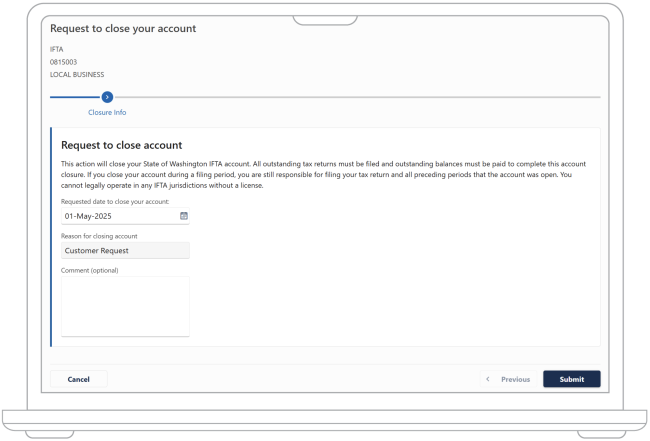
2. Enter or select the date you want your account to close.
3. Under “Reason for closing account,” License Express will automatically enter “Customer Request.” You cannot change this.
4. Optional: Under “Comment,” you can more details about why you want to close the account.
5. Choose the “Submit” button.
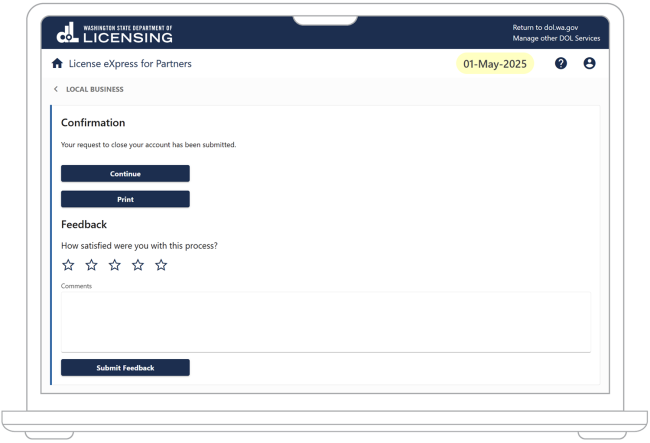
6. On the confirmation screen, you can either choose “Continue” to return to your dashboard or “Print” to print your confirmation.