
Before you get started
This guide is for new customers who have registered their License Express account but haven’t added a fuel tax account to their account.
If you previously used Taxpayer Access Point (TAP) to manage your account and complete other transactions, you can learn:
- How to set up a License Express account for your business
- How to set up a License Express account as a service agent
If you have never used TAP to manage your account, you can learn how to register it with License Express using this guide:
- How to register as an existing PRFT customer with an active account using an access code
- How to register as an existing PRFT customer with an active account using account information
Gather the required information
To set up a new fuel tax account in License Express, you’ll need:
- Your organization’s Unified Business Identifier (UBI) number for Washington
- The business type you have on file with the Department of Revenue (DOR) and the Secretary of State’s Office, which will be one of the following:
- Corporation
- General partnership
- Limited liability company
- Limited liability partnership
- Limited partnership
- Nonprofit corporation
- Sole proprietorship
- The following information about at least one person who owns the business, such as a corporate officer, partner, or director:
- Contact information
- Date of birth
- Information about each of their jobs over the last 10 years (including employer names and addresses, dates of employment, job titles, and supervisor names)
Depending on your business type, you’ll also need electronic copies of the following supporting documents:
Aircraft distributor documents
- Federal excise tax registration (IRS Form 637)
- Proof of bond coverage, such as a surety tax bond from your insurance company, certificate of deposit, or cash
Set up a new aircraft distributor account
Follow the steps below to set up a new aircraft distributor account for your business, government agency, or sole proprietorship.
At any time, you may choose the “Save Draft” button to save your progress and continue later. If you decide you don’t want to open a new fuel tax account, you may choose the “Delete Account” button to exit the registration process.
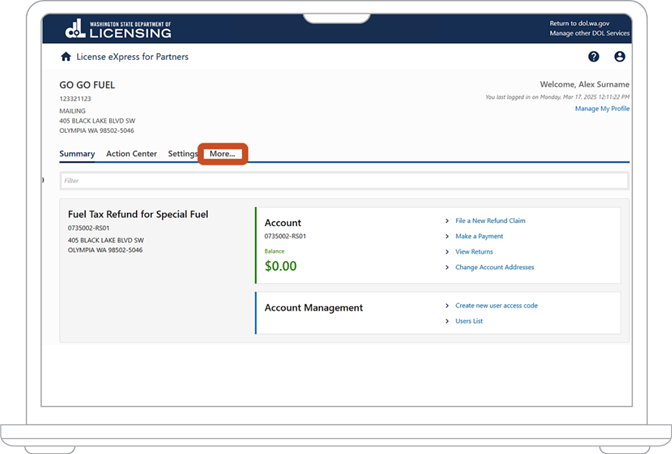
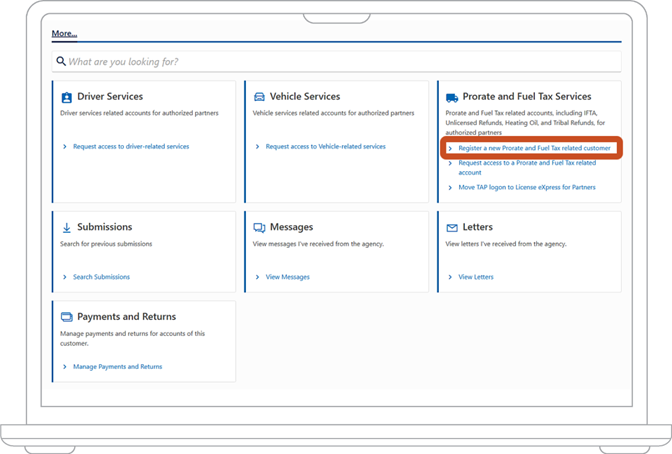
1. Once you are logged into License Express, on the homepage screen of your account, choose the “More” tab.
Note: If you just created a License Express web logon and have no accounts linked to your profile, your home page will look like the screenshot in step 2. Please jump to step 19.
2. Under the “Prorate and Fuel Tax Services” section, choose “Request access to a Prorate and Fuel Tax related account.”
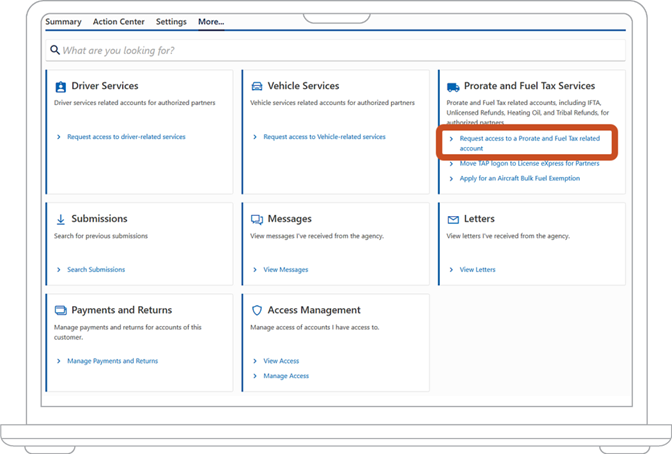
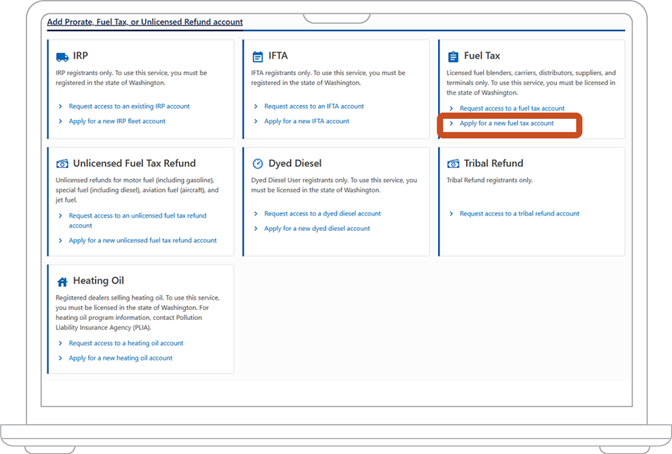
3. Under the “Fuel Tax” section, choose the “Apply for a new fuel tax account.”
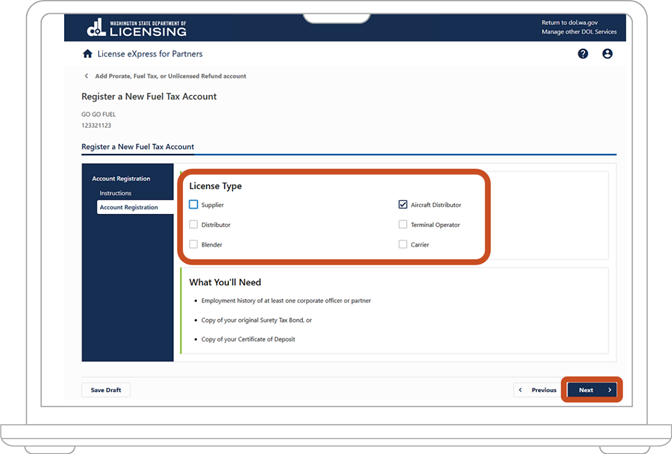
4. Read the “Fuel Tax Requirements” to make sure you have the information and documents you need. Choose the “Next” button.

5. On the “Account Registration” screen, check the “Aircraft Distributor” license type. Once that is selected, a “What You’ll Need” section will pop up. Look over the information then choose the “Next” button.
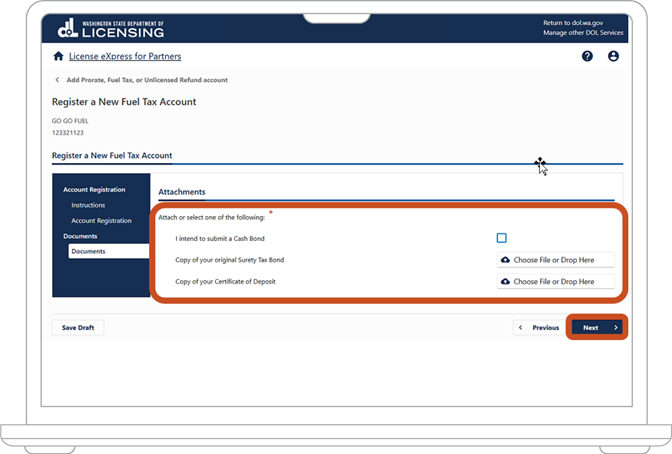
6. Upload the documents you need:
- To submit a Federal Excise Tax Registration (Form 637), choose the cloud icon to upload from the cloud or drag your file to upload it.
- If you want to submit a cash bond, check the box next to “I intend to submit a Cash Bond.”
- If you want to submit a surety tax bond, choose the cloud icon to upload from the cloud or drag your file to upload it.
- If you want to submit a certificate of deposit, choose the cloud icon to upload from the cloud or drag your file to upload it.
- Choose the “Next” button.
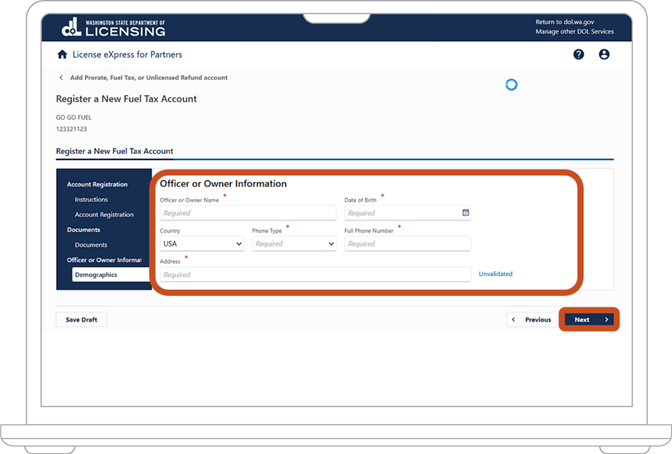
7. Provide information about the business owner or a corporate officer, partner, or director in the organization:
- Enter the person’s name.
- Enter or select the person’s birth date.
- In the dropdown menu under “Country,” select the country for the person’s phone number. License Express will automatically select “USA.”
- In the dropdown menu under “Phone Type,” select the person’s phone number type. Enter their phone number and extension (if applicable).
- Enter the person’s home address. This address should be the same as the one you entered during your customer registration.
- Choose the “Next” button.
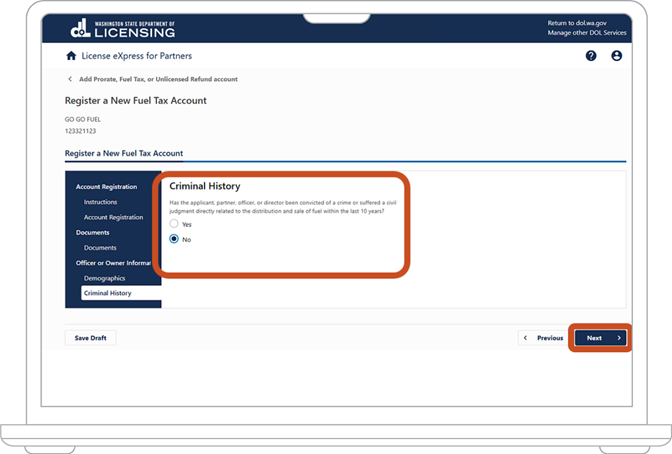
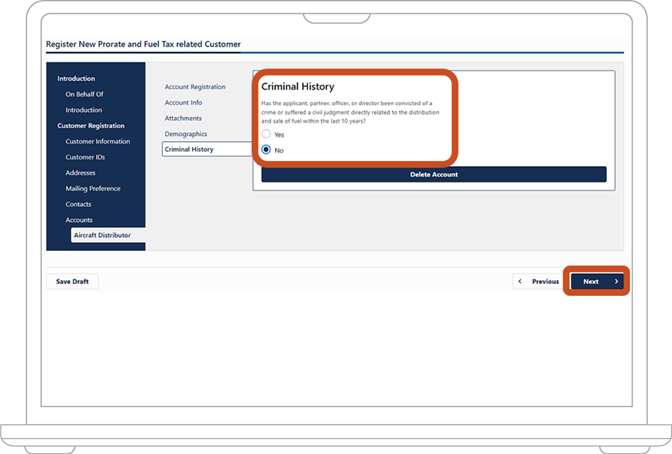
8. Answer whether this person has been convicted of a crime or suffered a civil judgment related to the distribution and sale of fuel within the last 10 years:
- If they have, choose the “Yes” option.
- If they haven’t, choose the “No” option.
9. Choose the “Next” button.
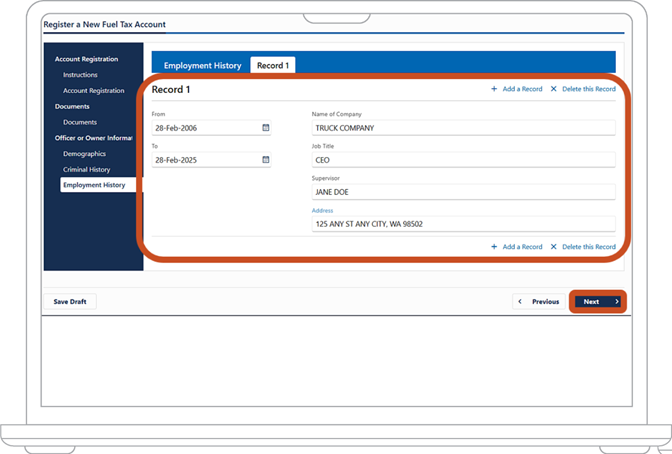
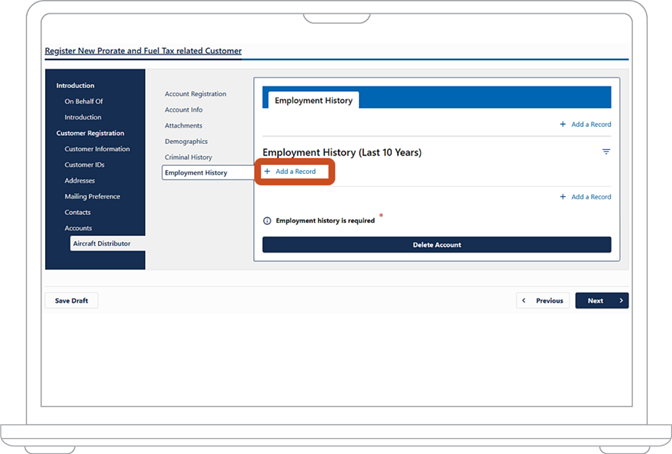
10. Provide this person’s employment history for the last 10 years:
- Choose "Add a Record.”
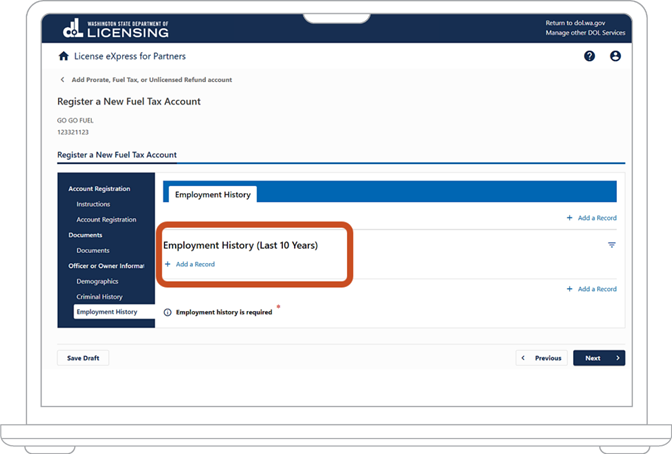
- Enter or select the start date for a position.
- Enter or select the end date for a position. If the person is still employed at this company, select today’s date.
- Enter the name of the organization where the person worked during this period.
- Enter the person’s job title.
- Enter the name of the person’s supervisor.
- Enter the address of the organization the person worked at.
- If you need to add more records to cover the last 10 years, choose "Add a Record” and repeat steps 9.1 through 9.6.
- Choose the “Next” button.
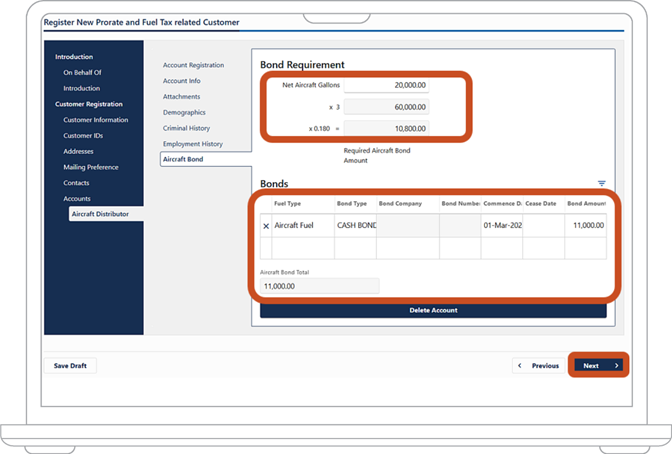
11. Enter your organization’s total net gallons of fuel. License Express will then automatically calculate your required bond amount:
- Under the “Bonds” heading, enter the following in the table:
- In the “Fuel Type” column, select the type of fuel your organization will be using from the dropdown menu. You can select either “Motor/Special Fuel” or “Aircraft Fuel.”
- In the “Bond Type” column, your options depend on the type of bond you previously chose to submit.
- If you previously chose to submit a cash bond, in the dropdown menu, select “Cash.” Skip to step 11.4.
- If you didn’t previously choose to submit a cash bond, in the dropdown menu, select “Cash,” “Surety Tax Bond,” or “Certificate of Deposit.”
- If you chose “Surety Tax Bond” or “Certificate of Deposit,” provide the following information.
- Under “Bond Company,” enter the name of the company (for surety tax) or bank (for certificate of deposit) that is insuring your bond.
- Under “Bond Number,” enter the number list on your bond.
- In the “Commence Date” column, enter the date the bond coverage begins. This coverage must start on or before the date your account becomes active.
- Optional: In the “Cease Date” column, enter the date the bond coverage ends.
- In the “Bond Amount” column, enter the amount of your bond. This should be equal to or more than the amount above “Required Bond Amount.”
- Choose the “Next” button.

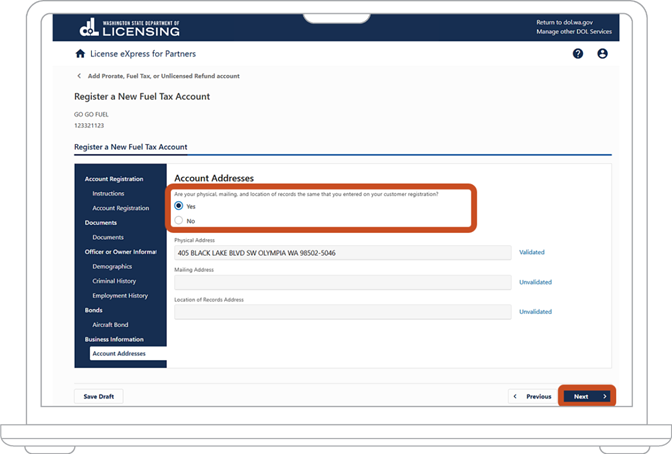
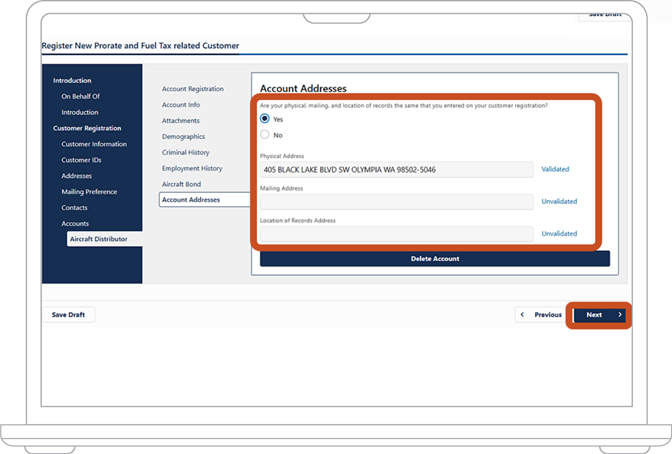
12. Indicate whether your organization’s physical address, mailing address, and the location of your records are the same as the ones you entered on your customer registration.
If they are the same, choose the “Yes” option. Then, choose the “Next” button.
If they are not the same, choose the “No” option and follow steps 12.1 to 12.4:
- Under “Physical Address,” enter the location of your organization.
- Under “Mailing Address,” enter the location where your organization receives mail, even if this address is the same as above.
- Under “Location of Records Address,” enter the location where your organization keeps its records.
- Choose the “Next” button.
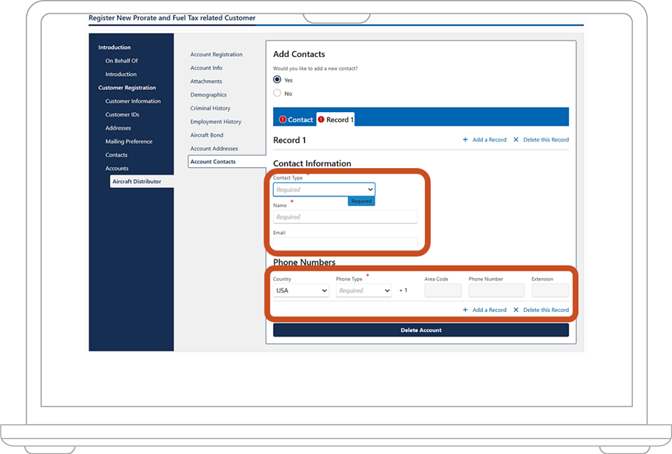
13. Indicate whether you want to add a new contact for your organization. This information will be associated with the new fuel tax account you're setting up. In most cases, this will be the owner of the organization. In some organizations, however, different units are responsible for different fuel tax accounts, and you can add the lead of a unit as a contact.
If you don’t want to add an additional contact for this account, choose the “No” option. Then choose the “Next” button.
If you want to add a contact, choose the “Yes” option. Then, under “Contact Information,” provide the following information:
- In the dropdown menu under “Contact Type,” select the contact’s relationship to the organization.
- Enter the person’s name.
- Enter the person’s email.
- In the dropdown menu under “Country,” select the country for the person’s phone number. License Express will automatically select “USA.”
- In the dropdown menu under “Phone Type,” select the person’s phone number type. Enter their phone number and extension (if applicable).
- To provide a second phone number for the contact, repeat steps 13.1 through 13.5.
- Choose the “Next” button.

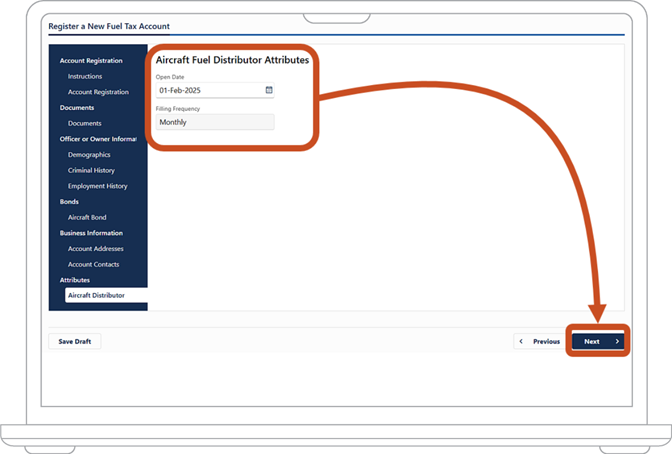
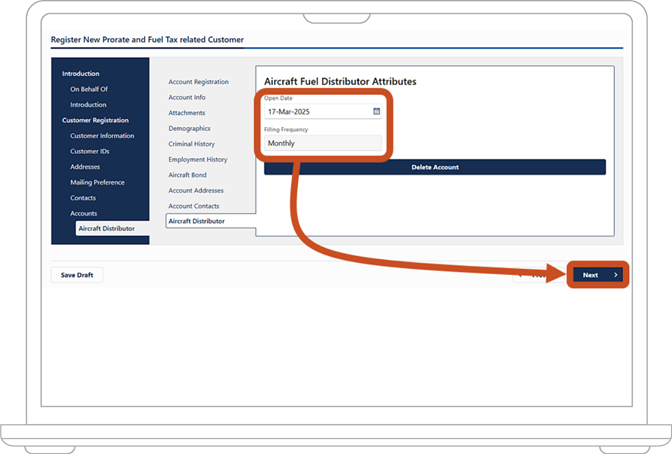
14. On the “Aircraft Fuel Distributor Attributes” page, under "Open Date," enter or select today's date. Under “Filing Frequency,” you can see that you must file monthly for fuel tax accounts. Choose the “Next” button.
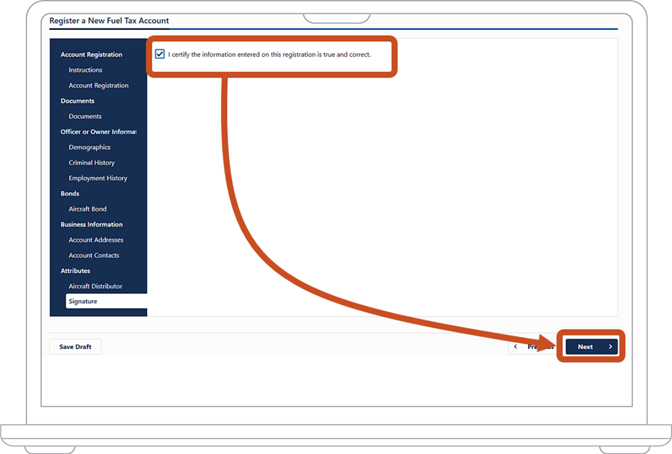
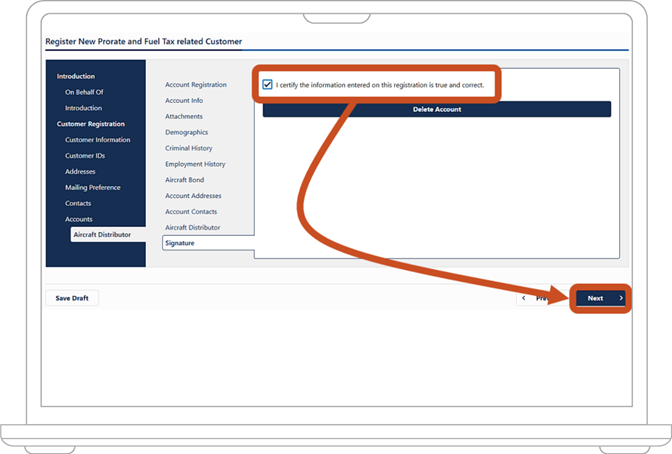
15. Check the box to confirm that the information you provided is true and correct. Choose the “Next” button.
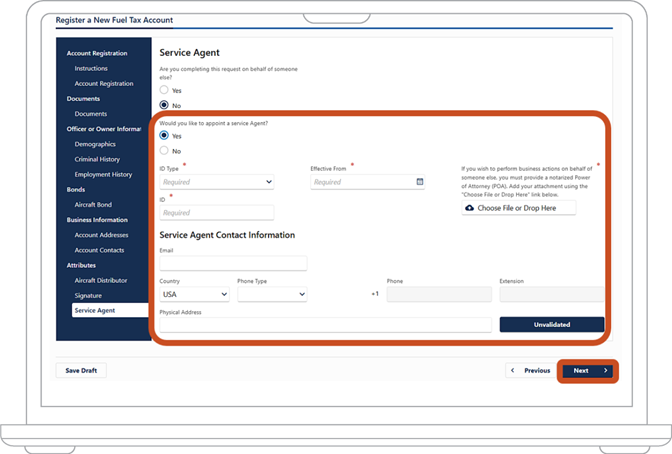
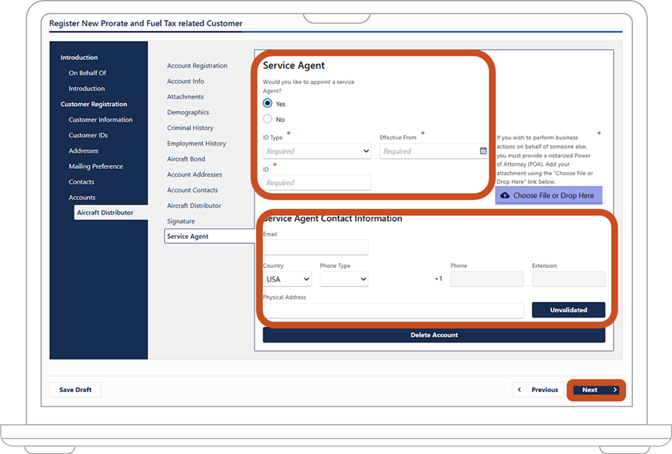
16. Choose whether you want to appoint a service agent.
If you don’t want to appoint a service agent, choose the “No” option. Then choose the “Next” button. Go to step 17.
If you want to appoint a service agent, choose the “Yes” option. Then provide the following information:
- In the dropdown menu under “ID Type,” select the type of ID number your service agent uses for their federal taxes. This may be the service agent’s Social Security number (SSN) or an Employer ID Number. The Employer ID number will be the service agent’s federal Employee Identification Number (EIN).
- Under “ID,” enter their EIN or SSN.
- In the dropdown menu under “Effective From,” select the date on which the power of attorney (POA) form was signed and notarized.
- To attach the POA form, choose the cloud icon to upload from the cloud or drag your file to upload it.
- Enter your service agent’s contact email.
- In the dropdown menu under “Country,” select the country for the service agent’s phone number. License Express will automatically select “USA.”
- In the dropdown menu under “Phone Type,” choose your service agent’s phone type from the options.
- Enter your service agent’s phone number and extension (if applicable).
- Enter your service agent’s physical address. This should be the exact same address that the service agent has under their own account.
- Choose the “Next” button.
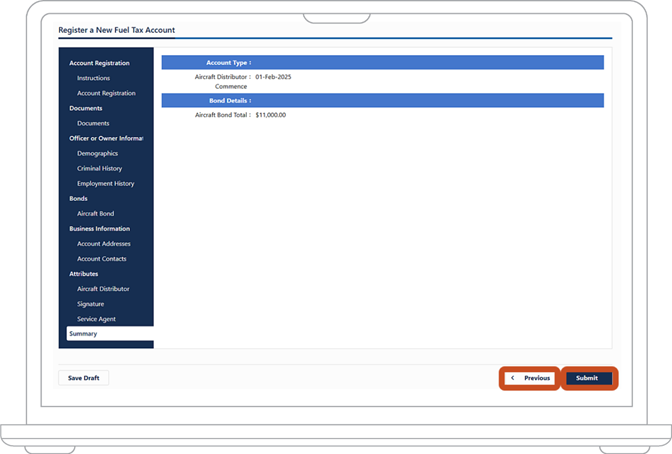
17. If you need to make corrections, choose the “Previous” button until you return to the appropriate screen. After you make your correction, choose the “Next” button until you have returned to the “Summary” screen.
18. Choose the “Submit” button.
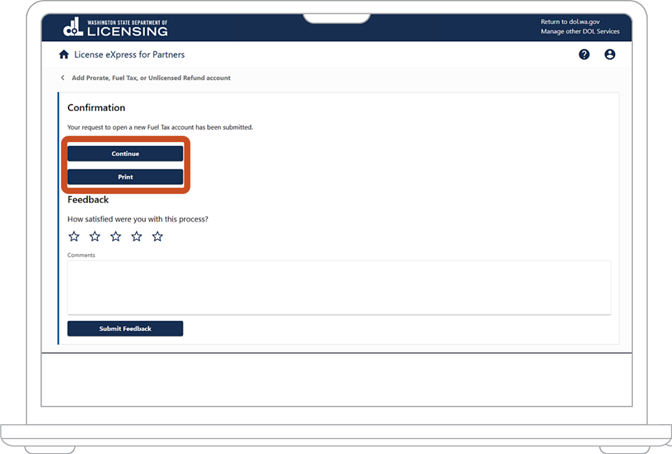
19. On the “Confirmation” screen, you'll see a confirmation number. Keep this number for your records. You can either choose the “Continue” button to go back to your dashboard or the “Print” button to print your confirmation page.
20. Follow these steps if you just created a License Express web logon with no accounts connected to your web logon:
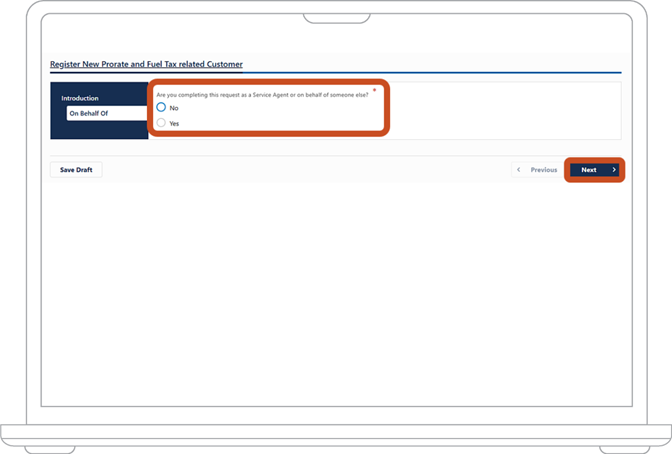
- Under the “Prorate and Fuel Tax Services” section, choose “Register a new Prorate and Fuel Tax related customer.”
- On the “On Behalf Of” tab, it will ask “Are you completing this request as a Service Agent or on behalf of someone else? After selecting your answer, choose the “Next” button.
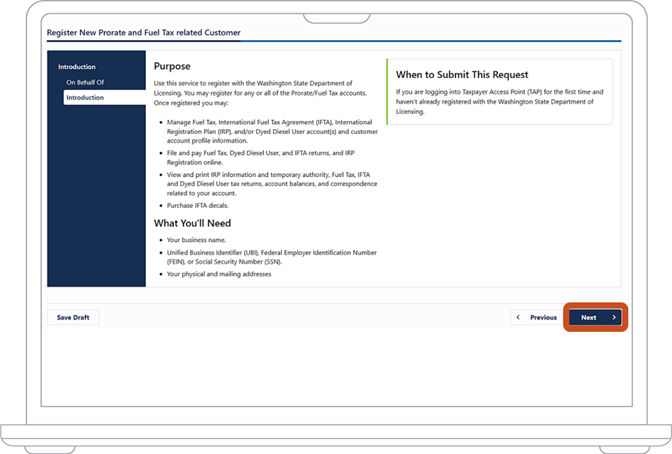
- On the “Introduction” tab, review the information and gather all documents that will be needed. Choose the “Next” button.
21. What you do next will depend on what you have selected on the “On Behalf Of” section:
- If “Yes,” skip to step 22.
- If “No,” skip to step 32.
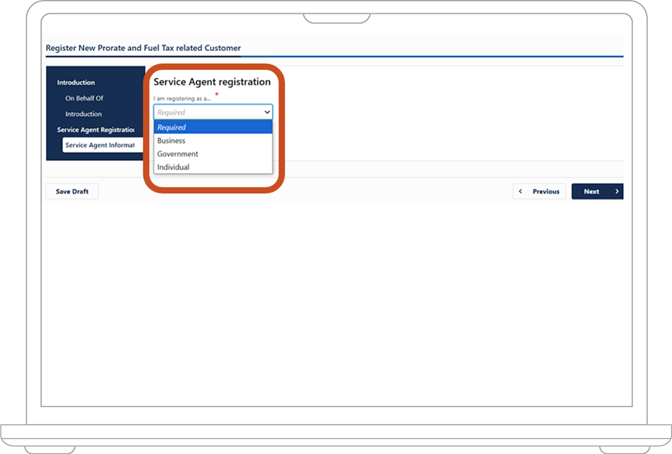
22. The “Service Agent Registration” tab, it will ask what you are registering as. On the dropdown menu the following options will display:
- Business
- Government
- Individual
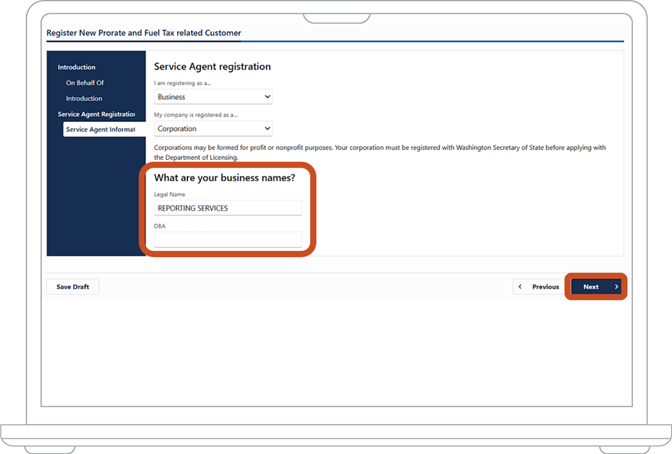
23. Once you make a selection, a new section will appear asking what your company is registered as. The dropdown menu will display the following options to choose from:
- Corporation
- General Partnership
- Limited Liability Company
- Limited Liability Partnership
- Limited Partnership
- Nonprofit Corporation

24. Once you make a selection, a new section will appear asking “What are your business names?” Enter the legal name and DBA if applicable. Choose the “Next” button.
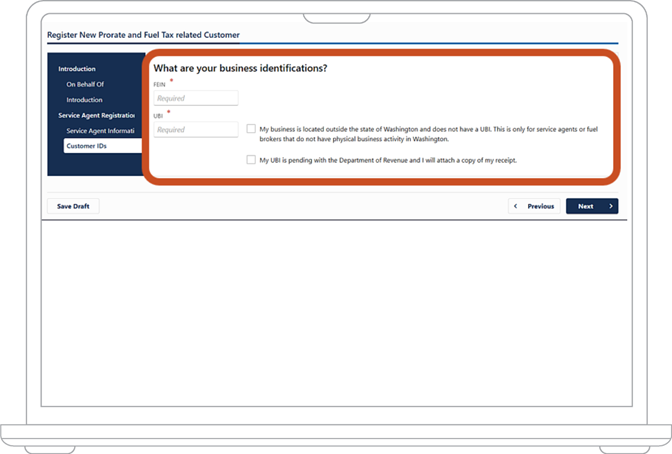
25. On the “Customer IDs” tab, you must enter the following details for your Service Agent business:
- FEIN
- UBI
If no UBI in WA state or you have one pending, check the appropriate box.
26. The “Addresses” tab will have you enter your physical address for your Service Agent business. It will also ask if your mailing or records address are different from the physical address. Make the appropriate changes then choose the “Next” button.

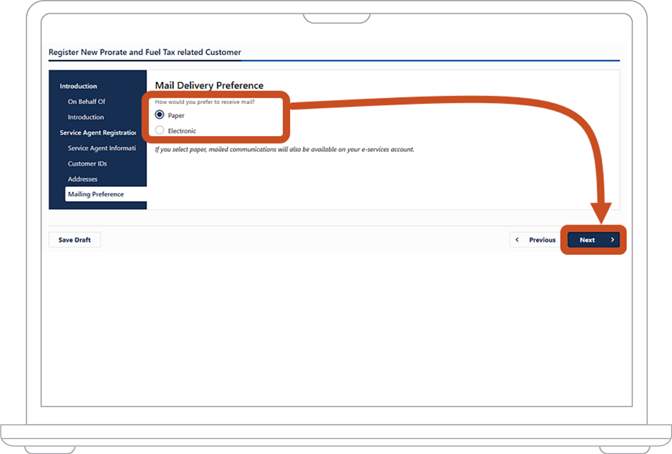
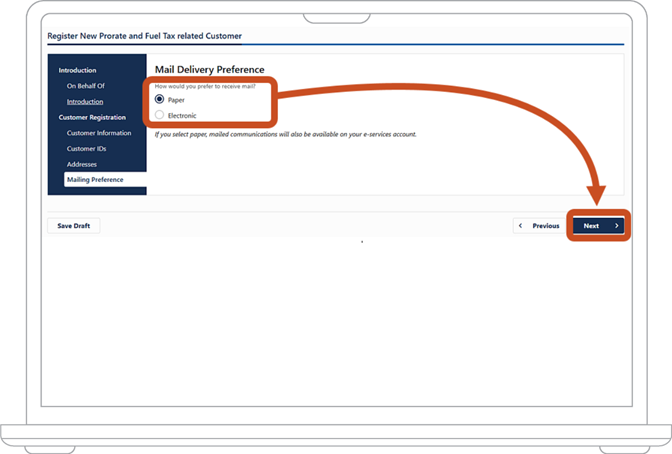
27. On the “Mailing Preference” tab, it will ask if you would like to receive mail by “Paper” or “Electronic.” Make your selection and choose the “Next” button.
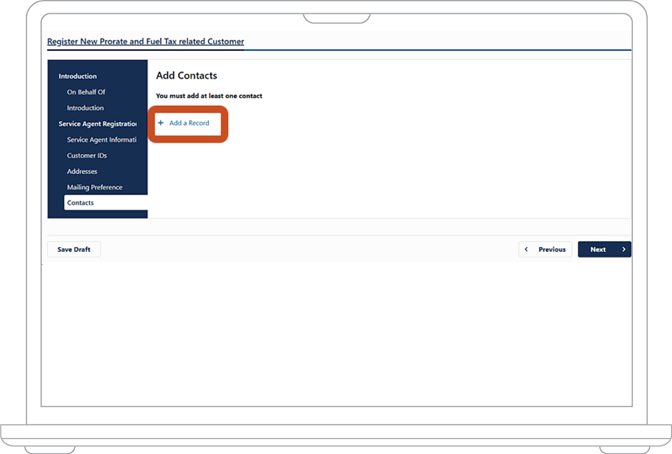
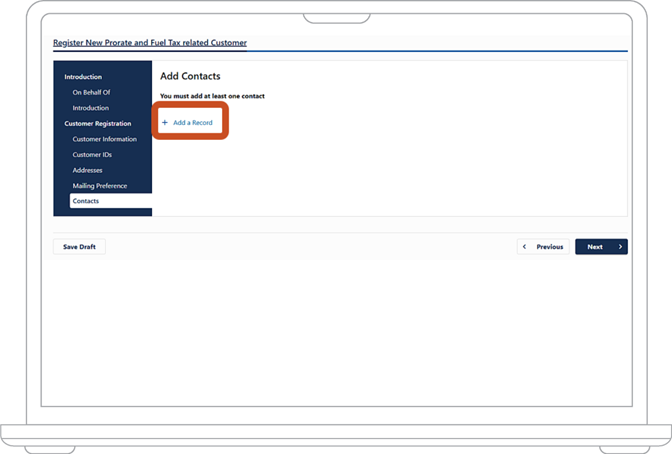
28. On the “Contacts” tab, choose the “Add a Record” hyperlink.
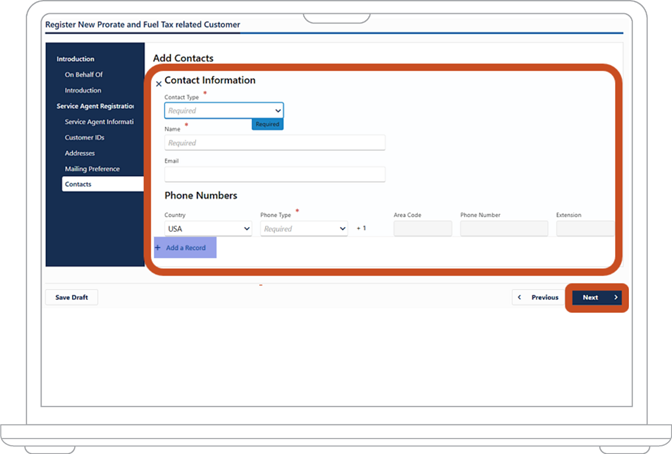
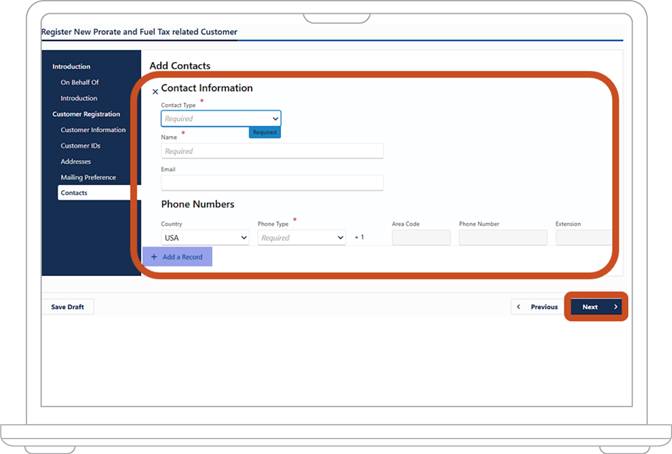
29. You will need to enter the following information:
- Contact Type
- Name
- Country
- Phone Type
- Phone Number
30. Once entered, you can choose “Add a Record” to add more records. If you have no more records to add, choose the “Next” button.
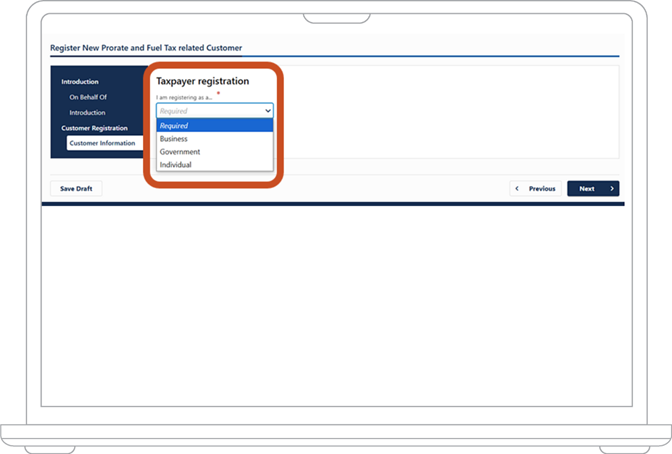
31. Now you are on the “Customer Registration” screen. The “Customer Information” tab will ask what your customer is registering as. Choose the applicable option under the “I am registering as a...” dropdown menu:
- Business
- Government
- Individual
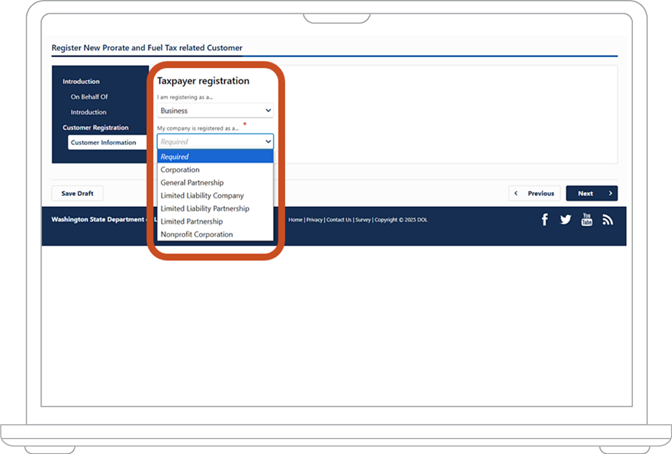
32. Once you make a selection, a new section will appear asking what your customer’s company is registered as. The dropdown menu will have the following:
- Corporation
- General Partnership
- Limited Liability Company
- Limited Liability Partnership
- Limited Partnership
- Nonprofit Corporation
33. Once you make a selection, a new section will appear asking “What are your business names?” Enter the legal name and DBA if applicable to your customer. Choose the “Next” button.

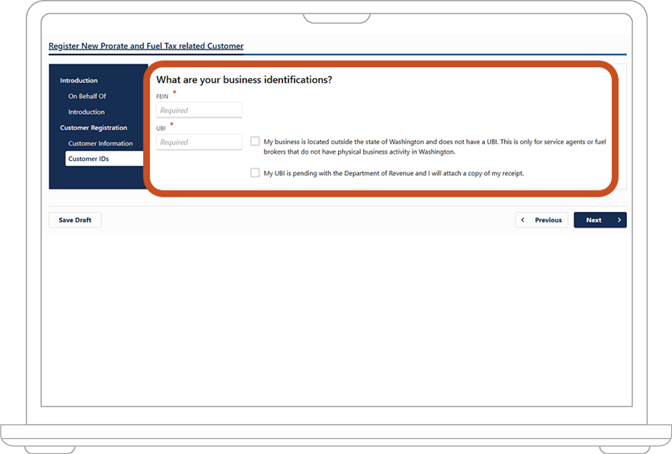
34. On the “Customer IDs” tab, enter the following details for your customer:
- FEIN
- UBI
If no UBI in WA state or you have one pending, check the appropriate box.
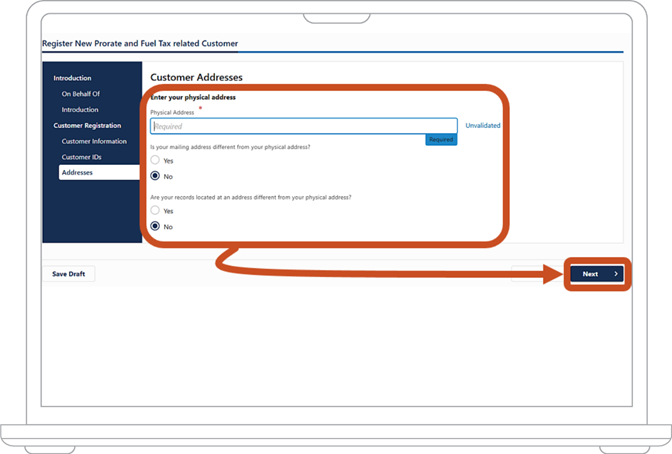
35. The “Addresses” tab will have you enter your physical address for your customer. It will also ask if your mailing or records address are different from the physical address. Make the appropriate changes then choose the “Next” button.
36. On the “Mailing Preference” tab, it will ask if you would like to receive mail by “Paper” or “Electronic.” Make your selection for your customer and choose the “Next” button.
37. On the “Contacts” tab, choose the “Add a Record” hyperlink.
38. You will need to enter the following information:
- Contact Type
- Name
- Country
- Phone Type
- Phone Number
39. Once entered, you can choose “Add a Record” to add more records. If you have no more records to add, choose the “Next” button.
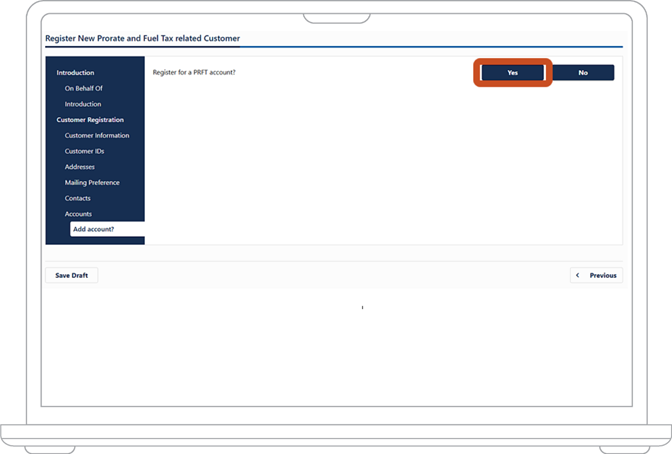
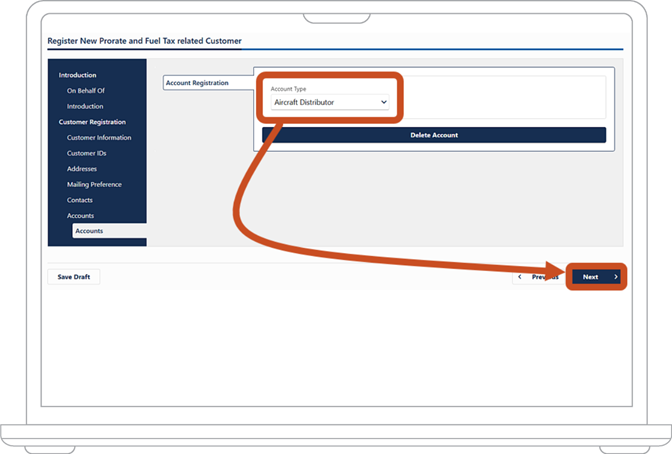
40. Now you are on the screen to “Register for a PRFT account” for your customer. Choose “Yes.”
41. In the dropdown menu under “Account Type,” select “Aircraft Distributor.” Then choose the “Next” button.
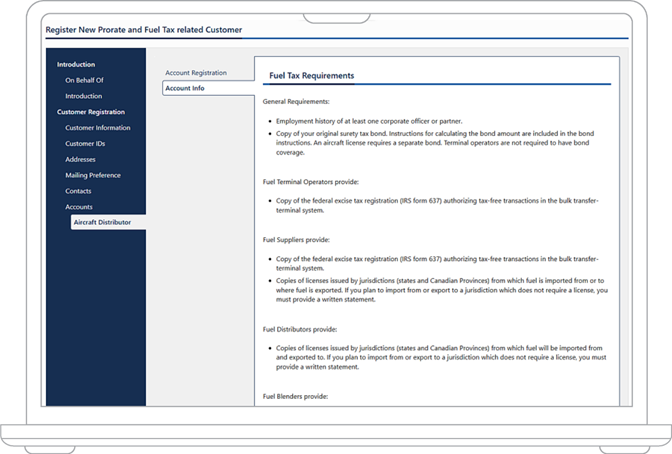
42. Read the “Fuel Tax Requirements” to make sure you have the information and documents you need. Choose the “Next” button.
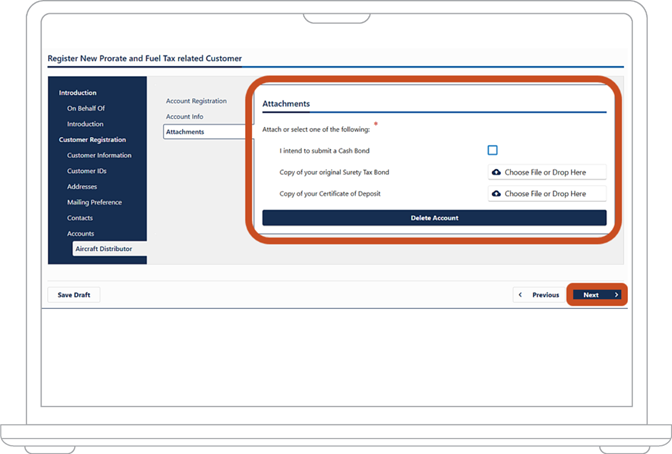
43. Upload the documents you need:
- To submit a Federal Excise Tax Registration (Form 637), choose the cloud icon to upload from the cloud or drag your file to upload it.
- If you want to submit a cash bond, check the box next to “I intend to submit a Cash Bond.”
- If you want to submit a surety tax bond, choose the cloud icon to upload from the cloud or drag your file to upload it.
- If you want to submit a certificate of deposit, choose the cloud icon to upload from the cloud or drag your file to upload it.
- Choose the “Next” button.
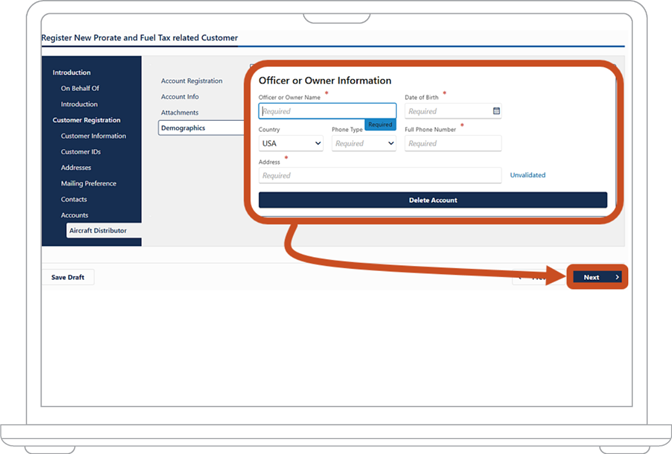
44. Provide information about the business owner or a corporate officer, partner, or director in the organization:
- Enter the person’s name.
- Enter or select the person’s birth date.
- In the dropdown menu under “Country,” select the country for the person’s phone number. License Express will automatically select “USA.”
- In the dropdown menu under “Phone Type,” select the person’s phone number type. Enter their phone number and extension (if applicable).
- Enter the person’s home address. This address should be the same as the one you entered during your customer registration.
- Choose the “Next” button.
45. Answer whether this person has been convicted of a crime or suffered a civil judgment related to the distribution and sale of fuel within the last 10 years:
- If they have, choose the “Yes” option.
- If they haven’t, choose the “No” option.
- Choose the “Next” button.
46. Provide this person’s employment history for the last 10 years:
- Choose "Add a Record.”
- Enter or select the start date for a position.
- Enter or select the end date for a position. If the person is still employed at this company, select today’s date.
- Enter the name of the organization where the person worked during this period.
- Enter the person’s job title.
- Enter the name of the person’s supervisor.
- Enter the address of the organization the person worked at.
- If you need to add more records to cover the last 10 years, choose "Add a Record” and repeat steps 47.1 through 47.7.
- Choose the “Next” button.

47. Enter your organization’s total net gallons of fuel. License Express will then automatically calculate your required bond amount. Under the “Bonds” heading, enter the following in the table:
- In the “Fuel Type” column, select the type of fuel your organization will be using from the dropdown menu. You can select either “Motor/Special Fuel” or “Aircraft Fuel.”
- In the “Bond Type” column, your options depend on the type of bond you previously chose to submit.
- If you previously chose to submit a cash bond, in the dropdown menu, select “Cash.” Skip to step 49d.
- If you didn’t previously choose to submit a cash bond, in the dropdown menu, select “Cash,” “Surety Tax Bond,” or “Certificate of Deposit.”
- If you chose “Surety Tax Bond” or “Certificate of Deposit,” provide the following information.
- Under “Bond Company,” enter the name of the company (for surety tax) or bank (for certificate of deposit) that is insuring your bond.
- Under “Bond Number,” enter the number list on your bond.
- In the “Commence Date” column, enter the date the bond coverage begins. This coverage must start on or before the date your account becomes active.
- Optional: In the “Cease Date” column, enter the date the bond coverage ends.
- In the “Bond Amount” column, enter the amount of your bond. This should be equal to or more than the amount above “Required Bond Amount.”
- Choose the “Next” button.
48. Indicate whether your organization’s physical address, mailing address, and the location of your records are the same as the ones you entered on your customer registration.
If they are the same, choose the “Yes” option. Then, choose the “Next” button.
If they are not the same, choose the “No” option and follow steps 50.1 to 50.4:
- Under “Physical Address,” enter the location of your organization.
- Under “Mailing Address,” enter the location where your organization receives mail, even if this address is the same as above.
- Under “Location of Records Address,” enter the location where your organization keeps its records.
- Choose the “Next” button.
49. Indicate whether you want to add a new contact for your organization. This information will be associated with the new fuel tax account you're setting up. In most cases, this will be the owner of the organization. In some organizations, however, different units are responsible for different fuel tax accounts, and you can add the lead of a unit as a contact.
If you don’t want to add an additional contact for this account, choose the “No” option. Then choose the “Next” button.
If you want to add a contact, choose the “Yes” option. Then, under “Contact Information,” provide the following information:
- In the dropdown menu under “Contact Type,” select the contact’s relationship to the organization.
- Enter the person’s name.
- Enter the person’s email.
- In the dropdown menu under “Country,” select the country for the person’s phone number. License Express will automatically select “USA.”
- In the dropdown menu under “Phone Type,” select the person’s phone number type. Enter their phone number and extension (if applicable).
- To provide a second phone number for the contact, repeat steps 49.1 through 49.5.
- Choose the “Next” button.
50. On the “Aircraft Fuel Distributor Attributes” page, under "Open Date," enter or select today's date. Under “Filing Frequency,” you can see that you must file monthly for fuel tax accounts. Choose the “Next” button.
51. Check the box to confirm that the information you provided is true and correct. Choose the “Next” button.
52. Choose whether you want to appoint a service agent.
If you don’t want to appoint a service agent, choose the “No” option. Then choose the “Next” button. Go to step 55.
If you want to appoint a service agent, choose the “Yes” option. Then provide the following information:
- In the dropdown menu under “ID Type,” select the type of ID number your service agent uses for their federal taxes. This may be the service agent’s Social Security number (SSN) or an Employer ID Number. The Employer ID number will be the service agent’s federal Employee Identification Number (EIN).
- Under “ID,” enter their EIN or SSN.
- In the dropdown menu under “Effective From,” select the date on which the power of attorney (POA) form was signed and notarized.
- To attach the POA form, choose the cloud icon to upload from the cloud or drag your file to upload it.
- Enter your service agent’s contact email.
- In the dropdown menu under “Country,” select the country for the service agent’s phone number. License Express will automatically select “USA.”
- In the dropdown menu under “Phone Type,” choose your service agent’s phone type from the options.
- Enter your service agent’s phone number and extension (if applicable).
- Enter your service agent’s physical address. This should be the exact same address that the service agent has under their own account.
- Choose the “Next” button.
53. Choose whether you want to register an additional account:
- If you don’t want to register an additional account, choose the “No” button.
- If you want to register an additional account, choose the “Yes” button to start the account registration process again.
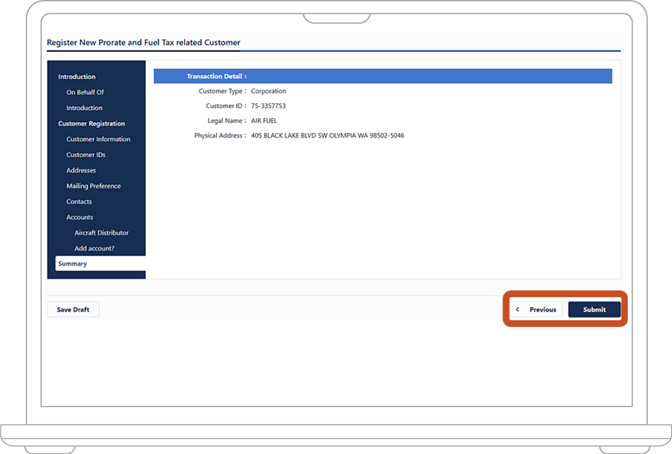
54. Under “Transaction Detail,” make sure your organization’s customer type, customer ID, legal name, and physical address are correct.
If you need to make corrections, choose the “Previous” button until you return to the appropriate screen. After you make your correction, choose the “Next” button until you have returned to the “Transaction Detail” screen. Then choose the “Submit” button.
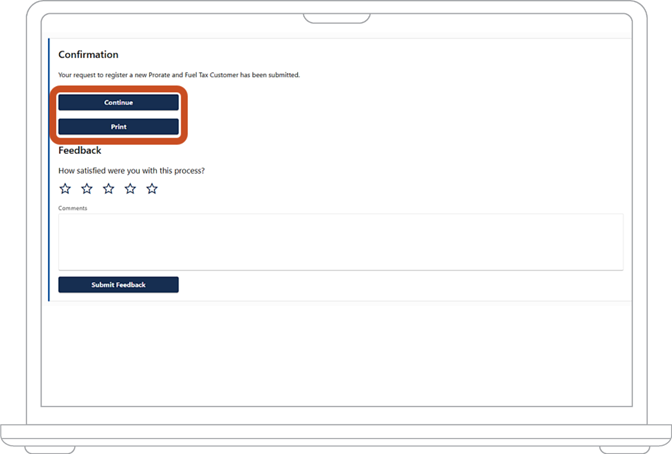
55. On the “Confirmation” screen, you'll see a confirmation number. Keep this number for your records. You can either choose the “Continue” button to go back to your dashboard or the “Print” button to print your confirmation page.
After you set up your account
We’ll verify the information you provided. We may contact you with questions at any time while we work to verify your information. Watch your email inbox or your mailbox, depending on the method of communication you chose.
If we don’t approve your account, we’ll tell you why. You can try again once you have the correct information or documents.