
Before you get started
This guide is for existing customers who have a tribal refund account through License Express and want to file for a refund.
Gather the required information
To file a tribal refund claim in License Express, you’ll need electronic copies of invoices for all fuel you purchased during the filing period.
You must submit an invoice or receipt for each time you purchased fuel that qualifies for a tax refund. To create an electronic copy, you can take a photo of the invoice or scan it.
In addition to uploading copies of the invoices, you’ll need to submit the following information for each:
- Type of fuel you purchased: motor or special
- An invoice number
- A date for the invoice
- The number of gallons you used that have invoices
- Station location
You can provide this information by entering it into a spreadsheet (for example, an Excel file) and then importing that file, or you can enter it manually in License Express.
File a tribal refund claim
Follow the steps below to file a tribal refund claim.
At any time, you may choose the “Save Draft” button to save your progress and continue later.
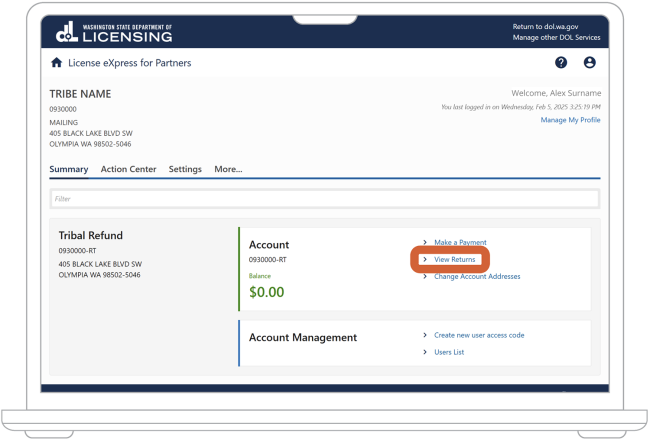
1. On the “Summary” page, find the “Account” section. Then choose “View Returns.”
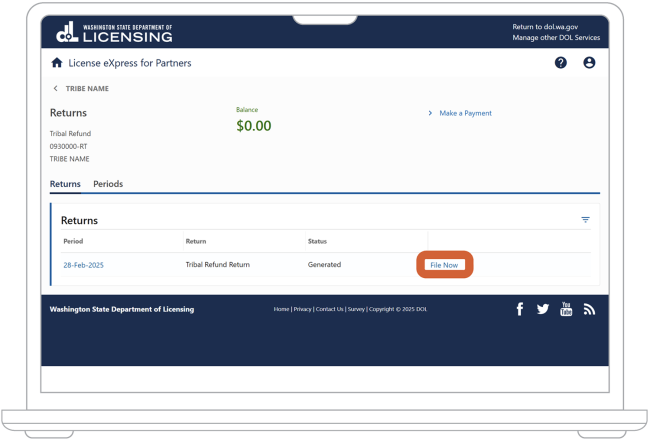
2. Under “Returns” choose “File Now.”
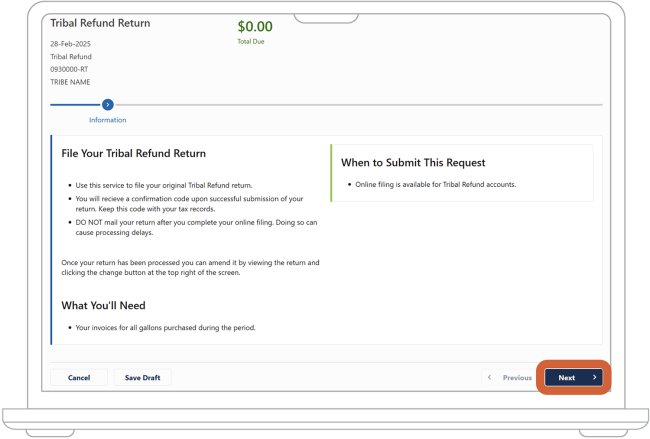
3. Read the information under the “File Your Tribal Refund Return” heading. Then choose the “Next” button.
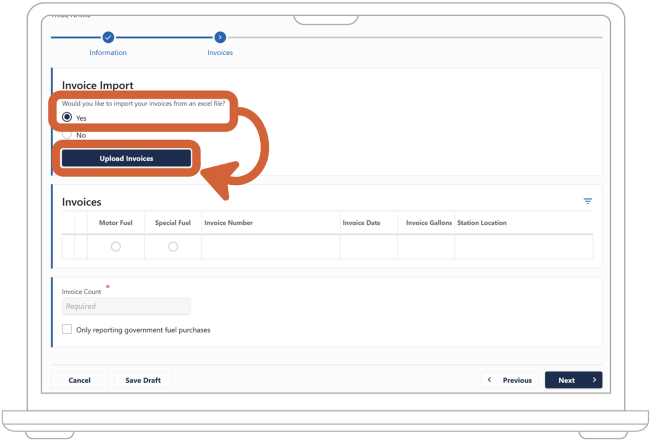
4. In the “Invoice Count” section, don’t check the box next to “Only reporting government fuel purchases.”

5. Under the “Invoice Import” heading, indicate whether want to import your invoices from an Excel file:
- Choose the “Yes” option if you want to import your invoices. Go to step 6.
- Choose the “No” option if you don’t want to import your invoices. Skip to step 11.
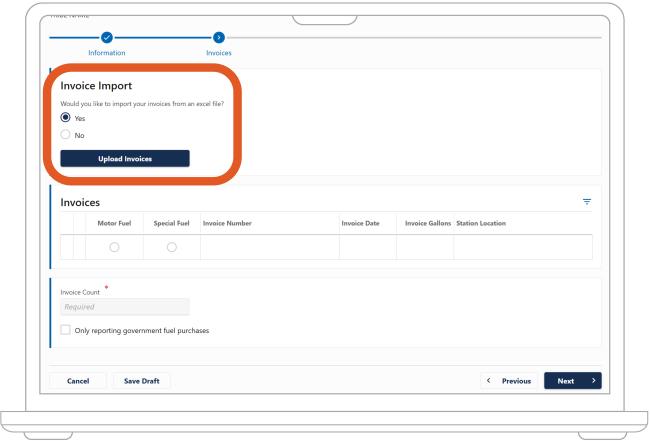
6. If you chose to upload your invoices, choose the “Upload Invoices” button.
7. In the popup box, under “Select a file to import,” choose the “Choose File” button.

8. From your computer, select the Excel file with your invoice information. Note: License Express will only accept invoices that use our tribal refund template.
9. Choose the “OK” button.
10. In the table under “Invoices,” make sure the information you uploaded from your Excel file is correct. Then skip to step 12.
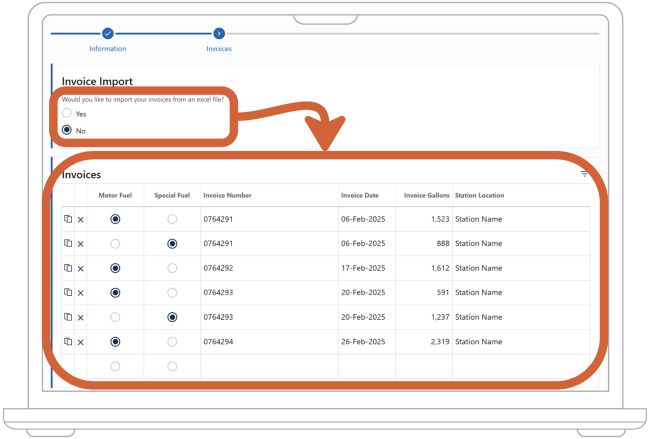
11. If you chose not to upload your invoices, in the table under “Invoices,” enter the following information for each time you purchased fuel:
- Choose either the “Motor Fuel” option or the “Special Fuel” option.
- In the “Invoice Number” column, enter the invoice number for this fuel purchase. You can find this number on the invoice.
- In the “Invoice Date” column, enter the date you purchased this fuel.
- In the “Invoice Gallons” column, enter how many gallons of fuel you purchased.
- In the “Station Location” column, enter the name of the station where you purchased this fuel.
- Repeat steps 11.1 to 11.5 for each invoice. When you’re finished, choose the “Next” button.
12. Remember, don’t check the box next to “Only reporting government fuel purchases.”
13. Choose the “Next” button.
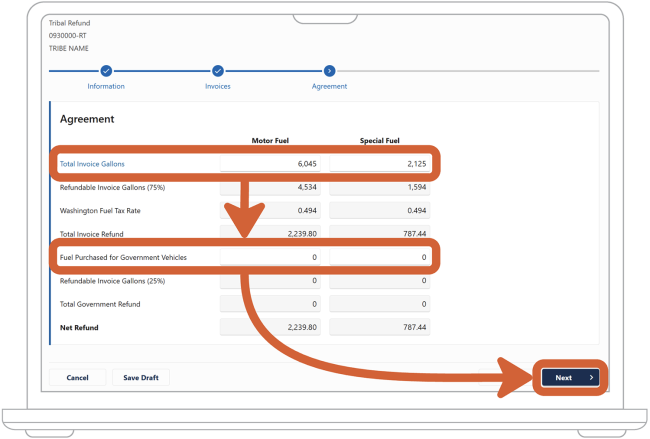
14. Under the “Agreement” heading, provide the following information:
- In the “Motor Fuel” column, for “Total Invoice Gallons,” enter the gallons of motor fuel you invoiced for the filing period.
- In the “Motor Fuel” column, for “Fuel Purchased for Government Vehicles,” make sure “Fuel Purchased for Government Vehicles” is 0.
- In the “Special Fuel” column, for “Total Invoice Gallons,” enter the gallons of special fuel you invoiced for the filing period.
- In the “Special Fuel” column, make sure “Fuel Purchased for Government Vehicles” is 0.
15. Choose the “Next” button.
16. Under the “Attachments” heading, you’ll upload electronic copies of all your invoices for the fuel you purchased:
- To attach an invoice, choose “Choose File or Drop Here.”
- From your computer, select the file you want to upload.
If you uploaded an incorrect file and need to replace it, choose the “X” icon next to the cloud icon to delete it. Then repeat steps 16 and 16b.
- In the “Attachment Type” column, enter a description of this file. For example, you could enter “Invoice 1.”
- Repeat steps 16.1 to 16.3 until you have uploaded invoices for all gallons of fuel you purchased. Then choose the “Next” button.

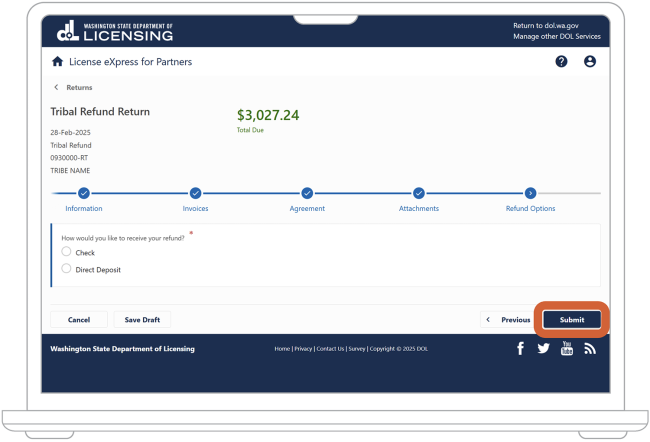
17. Above “Total Due,” you can see the total amount of your tribal refund.
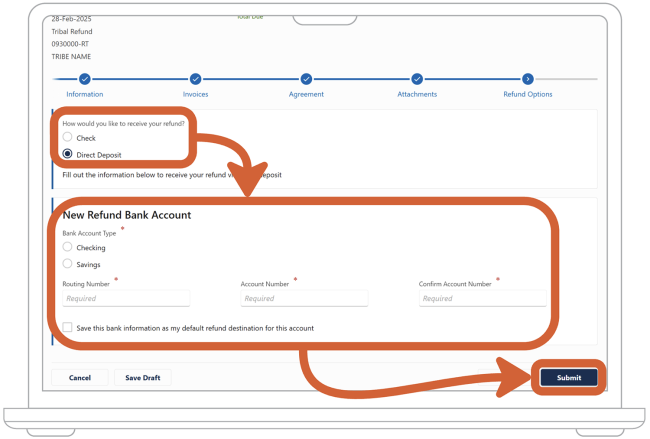
18. Under “How would you like to receive your refund?,” indicate how you want to receive your refund:
- Choose the “Check” option if you want us to mail your refund as a check. Then choose the “Submit” button and skip to step 21.
- Choose the “Direct Deposit” option if you want us to send your refund to a bank account. Then choose the “Submit” button and go to step 19.
19. Under the “New Refund Bank Account” heading, provide the following information:
- Indicate your bank account type. Choose the “Checking” option to deposit your refund into a checking account. Choose the “Savings” option to deposit your refund into a savings account.
- Enter your bank routing number.
- Enter your bank account number.
- Enter your bank account number again.
Optional: If you’d like License Express to save this information for the future, check the box next to “Save this bank information as my default refund destination for this account.”
20. Choose the “Submit” button.
21. On the “Confirmation” screen, you'll see a confirmation number. Keep this number for your records.
You can either choose the “Continue” button to go back to your dashboard or the “Print” button to print your confirmation page.
After you file your tribal refund claim
We’ll verify the information you provided. We may contact you with questions at any time while verifying your information. Watch your email inbox or your mailbox, depending on the method of communication you chose.
If we need changes, we’ll tell you why. You can try again once you have the correct information or documents.